Welcome back my glorious Basterds, I've once again come to grace your eyes with progress to the doom of egg. Let's not dawdle on and get to the updates.
To start off with, I was only able to do one thing I wanted to from the previous devlog, that being finishing off the skills that everyone can use. The most obvious, and near essential feature, being Scan. Scan allows you to scan enemies, but it holds a bit more use in ODNaF as it allows you to see the glory that is R E S I S T A N C E S. Now you no longer have to worry that I put resistances on the enemy to not be paralyzed, you just have the luck equivalent to the money an intern makes (none).
Here is how the scan will look like ingame:
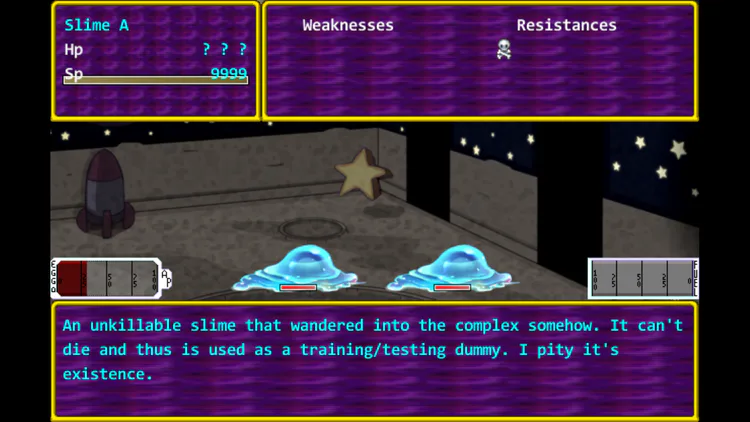
Pretty spiffy. Although those two bars on either side of the screen need some explaining.
What took up a majority of my time not obsessively playing Don't Starve Together was making these goddamn bars to behave. There will be four total that appear in this fashion through the game. Let's start off with the bar that will appear in every area, the Ap Bar (left side).
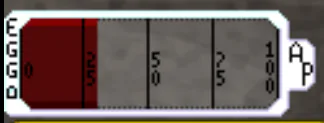
The Ap Bar will work not to far off from how the Leader Skills bar worked in Persona Q/Q2 totally not because I'm just straight up ripping off that mechanic or whatever. How it will work is that you will gradually gain Ap for every damaging action you take. Even if it fails miserably, you'll still get the points for taking the initiative. Some skills will gather Ap faster than others, and you'll just have to figure out which skills do and don't. Generally though, skills that have more risk involved in using them (High Sp costs, decently high chance to miss, random damage, etc.) will gather Ap faster than the others.
Why the hell does Ap even matter? You maybe wondering, and besides that punishable offence of doubting me, what Ap will do is unlock skills like this:

These skills can be used instantly, although only one of them can be used per turn. These effects can easily turn the tides of battle (maybe) with shit like Hp Regen and increasing the timers for Buffs, Debuffs, and Ailments/States. However for every yin there has to be a yang. For every robust potato, there's a poopy brussel sprout. For every cigarette trash can, there is a shitton of butts on the ground around it. And for every beneficial bar, there is a sabotaging bar.
These bars will very from area to area, centering around one the core mechanics from their base game counterparts. Each of these bars will proverbially shit on you with their mechanics, but there are ways to stave off the rerocussions, and ways that you can turn their dickery for the better.
For the Basement we have:
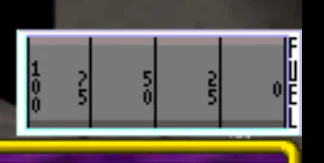
The Fuel Bar. This bar will slowly deplete over the course of 10 turns, at which point the building's lights will shut off on everyone. Allies and Foes alike will be hit with the deadly CantHitShititis disease and will be unable to land attacks a large majority of the time. Any attack that does hit will be a blessing that you must savor. Due to not being able to land attacks, a majority of enemies will decide to take this chance to take defensive action (mostly just Guarding) as there ain't much else to do. You could take up a similar approach and start taking this time to heal up or some shit, but you'll eventually have to turn the generator back on. You can do this action for free, adding 5 turns worth of fuel back into the generator. Always remember that retreating into the shadows to heal back up is a coward's tactic, but that cowards are the one's that actually survive most of the time.
For the Living Room we have:
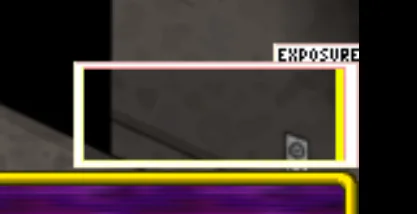
The Exposure Bar. This bar will gradually increase over time in the map as well as battle. In battle, the amount of exposure gained is equal to the amount of party members you have in the party at that moment. What exposure does is determine how tough the enemies you face will be (maybe, this one is purely theory at the moment) and make the enemies attack's stronger/generally better. For example, an attack debuff skill with high exposure might give 2 or 3 stacks of debuff instead of one. However, due to being so hyper exposed, the enemies skills start missing more often. So if you're looking down the barrel of a gang of enemies about to fuck you up, you can at least pray to RnGesus to maybe spare your ass. If you're an actually reasonable person and don't want this fate upon you, standing in the dark and covering your face with... something seems to work pretty well at reducing it.
For the Freezer we have:
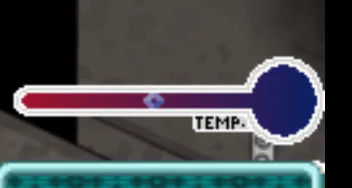
The Temperature Bar. The marker will slowly go right both on the map and in battle. You can easily negate this mechanic by starting battle near a hot spot, but those are few and far between. What this bar does is when it gets decently close to the cold circle, everyone starts Freezing to death. You can't actually die from it, but what will happen is that various aspects about you, primarily your Max Hp, will gradually decrease with each turn, up to a max of 10 stacks of the status. There is various methods of preventing the onset of Freezing, but the most readily available is shivering your cartoon ass. Shivering removes all the stacks of Freezing you have on you, thus allowing you to regain your stats but it has a very long cooldown. You can also just throw wood into the fire to increase the gauge, but that cost some of your precious money, so your merism will be put into question.
And that's about all the major things I have to report on for now. As seen by the teaser sent out on Monday, I've added a script that adds bars underneath the stats, so that's neat.
In other news, I've made a playlist of the music I am/planning to be using in the game, found Here.
So yeah, see you next month, when I'll be releasing a new tech demo. Why? To give me that intrinsic fear/desire to make it decent so that I show that I'm no entirely incompatent. But that's all, I'm tired, and am going to retire to playing Metal Gear Solid: Revengence for maybe a few days.
Have a good rest of your day, afternoon, night, fuck it any time really,
Frashaw27




0 comments