Hello!
In this devlog, I thought I would go over something which took quite a bit of time: extending what Unity sprites can do.
Tales of Kulplex is technically a 2.5D game, but the term “2.5D” has quite an imprecise definition. It is loosely defined as: “between 2D and 3D”.
That could mean 2D graphics for characters and 3D objects for the environment:

Paper Mario
It could also mean the complete opposite (3D graphics for characters and 2D for the rest):

New Super Mario Bros. U
Or 3D objects restricted to 2D movements:

Donkey Kong Country Returns
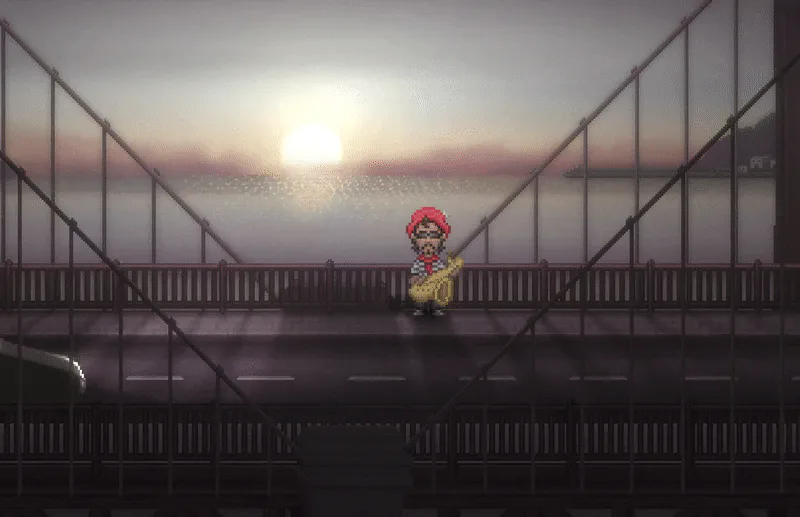
Or even just a game with 2D graphics but with 3D movement:

Castle Crashers
Tales of Kulplex falls into the last category. For this reason, I think “simple” sprites, while perfectly suited for pure 2D games, wouldn’t be sufficient to bring out the best of the additional half dimension (the remaining 0.5D).
What Unity provides
Sprite is a generic term for 2D images (for some nice additional info: Sprites on Wikipedia) and are used pretty much
in every game, from menus and UI to just about everything in the game.
Unity, having a 2D engine as well 3D, clearly supports sprites and provides several different shaders to modify the rendering of sprites.
Here is an (incomplete) list of shaders which can be used for sprites, with an overview of the features I care about:
Sprites > Default:
			- Lighting: NO
- Tint: YES
- Sprite Transparency: YES
- Runtime Transparency: YES
- Cast/Receive Shadows: NO
Sprites > Diffuse:
			- Lighting: YES
- Tint: YES
- Sprite Transparency: YES
- Runtime Transparency: YES
- Cast/Receive Shadows: NO
UI > Default:
			- Lighting: NO
- Tint: YES
- Sprite Transparency: YES
- Runtime Transparency: YES
- Cast/Receive Shadows: NO
UI > Lit > ALL:
			- Lighting: YES
- Tint: YES
- Sprite Transparency: YES
- Runtime Transparency: YES
- Cast/Receive Shadows: NO
UI > Unlit > ALL:
			- Lighting: NO
- Tint: YES
- Sprite Transparency: YES
- Runtime Transparency: YES
- Cast/Receive Shadows: NO
Unlit > Transparent:
			- Lighting: NO
- Tint: YES
- Sprite Transparency: YES
- Runtime Transparency: NO
- Cast/Receive Shadows: NO
And an additional shader, normally for 3D objects, which doesn’t support transparency within the image:
Standard:
			- Lighting: YES
- Tint: NO
- Sprite Transparency: NO
- Runtime Transparency: NO
- Cast/Receive Shadows: YES
Something which quickly stands out is the fact that not all the default sprite shaders support shadows and lighting may or may not be supported.
Question: What should one do if they want to support: Lighting, Tint, Transparency AND Shadows?
Answer: Make a custom shader! (SPOILER: It turns out supporting runtime transparency AND shadows at the same is a pain, so sadly I had to compromise.)
Pimping up the Sprites
If we just took the Default Sprite shader and threw in a couple of sprites and a cube, you’d have something like this:

It looks fine but definitely a little flat, as there is nothing to give the feeling of depth.
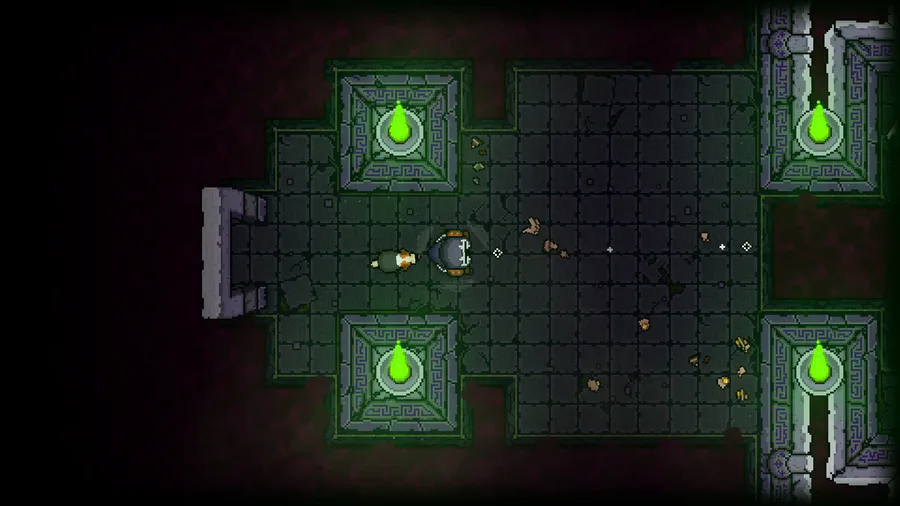
Shadows
The first important step would be to support shadows, that is possible with a neat shadow shader (Anlev’s Sprite Shader on GitHub):

That already looks much better! Now both 2D and 3D objects can receive and cast shadows on each other, giving much more depth.
Bonus: Normals for Sprites? No way!
While exploring what sprites normally aren’t capable of, I found out that it’s possible to add normals to sprites. According to Wikipedia, normals (or normal mapping) is a technique used for faking the lighting of bumps and dents.
It uses a map of the desired bumps in the sprite to give a more natural appearance.
To create and apply a normal map, one can use any image editor and do it manually, or use something like TexturePacker (it’s not completely for free but some features are).

And even with a very badly generated normal map (I know, it’s really bad), the background looks a bit more “3D-ish” and totally badass.
Shadows AND Transparency
It turns out that using the shadow shader (using a surface shader and a Lambert lighting model), the transparency becomes a cutout:
either fully visible or fully invisible.

That’s no good when you would like to fade in or out sprites to show/hide certain locations at runtime.
To support both shadows and transparency, 2 additional passes are required (one for the transparency and one to bring back the depth, lost in the previous step), making it unnecessarily heavy for just rendering simple sprites.
After lots of iterations and tests, I realized that I really never needed them at the same time, so I compromised to use 2 shaders instead:
No Transparency / Shadows

Transparency / No Shadows

Bonus: Transparency AND Normals? Madness!!!
What about those normal maps we briefly talked about earlier? Well, they work just as well with transparency, so that’s great news!

Conclusion
After spending a long time studying, researching and discussing with other developers, I ended up with a non-elegant solution (supporting everything with 2 shaders rather than just 1). The developer in me was at first a bit upset that I didn’t manage to achieve both tasks at once: supporting transparency and shadows doesn’t sound SO complex.
It was actually after more studying that I fully understood (finally) how transparency, lighting and shadows are calculated and applied.
Even major AAA companies need to be careful when handling transparent objects in their games, either they can look bad or perform poorly (a very interesting presentation about lighting in Far Cry 5 here).
In the end, I learnt that sometimes compromising is not so bad and can be the best way forward.
Here is a little compilation of the different tests:

You can get in touch with us and stay up-to-date on:
Discord: https://discord.me/talesofkulplex
Facebook: https://www.facebook.com/talesofkulplex/
Twitter: https://twitter.com/talesofkulplex
Feel free to leave a comment, especially if you have something to add or fix! :D
Take care!
Nesh


1 comment