


CREDITS:
FFPS-UCN By Scott Cawthon, AR By Illumix and HW by Steel Wool
TJOC By Nikson
Post-Shift & BBiN by Rjac25
Baby’s Nightmare Circus & Tyke & Son’s Lumber Co. By Mixlas
Dormitabis by Nicchi (I don’t Condone Actions), Remaster by Expelled
A Shadow Over Freddy’s by Phisnom
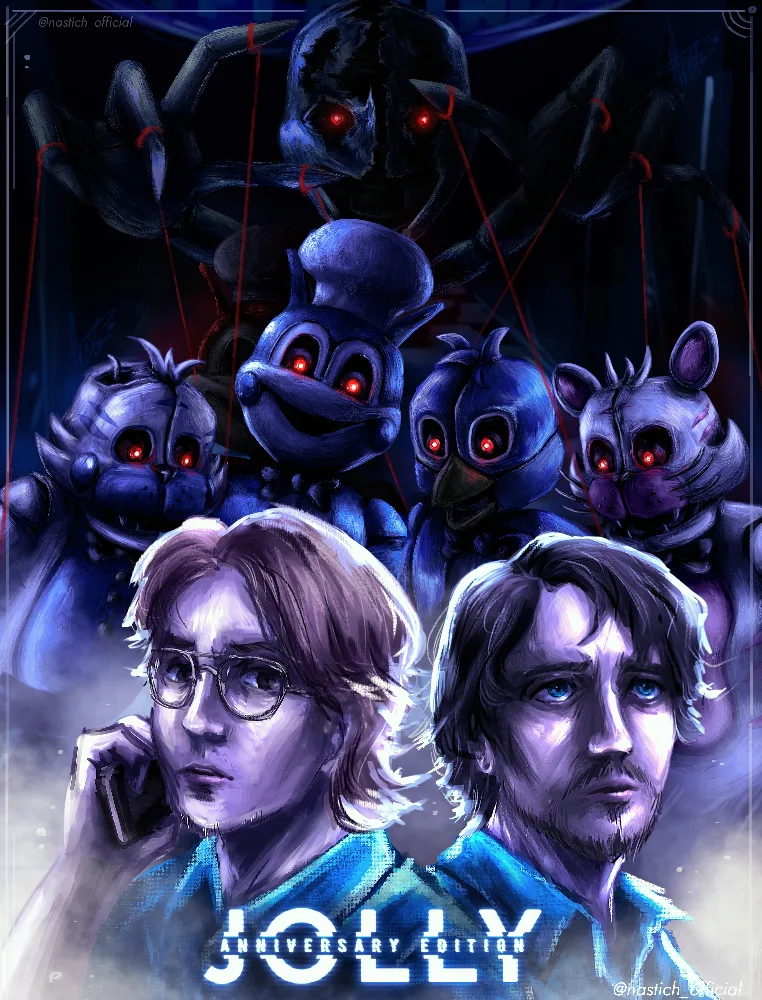
Jolly Series by IvanG
The Lost Ones, TEOD, OR & SCRAPPED By Malrat
ADI By Desko (OCs belong to their respective Owners, I did not make them)
Expectation Fredbear by Ruthorborginor
FNAC 3 By Emil Macko
TRTF By BFPFilms
Granny by Dennis Vukanovic
Baldi’s Basics by Mystman12
DDLC By Dan Salvato
Stylized Springtrap by Failz
Stylized Nightmarionne by Cortez
Nightmare Funtime Freddy by Misterfab1970
Five Nights with 39 by 39Games
Stuffed by Fedriz Marini
Mechanics
(Note all characters in UCN Possess their original Mechanics, So Let’s start with those who got added in, Fredbear will be an exception)
Candy Cadet: At Random, the Candy Cadet will activate and make noise. Give him a Fazcoin to make him stop.
Security Puppet: Keep the Global Music Box on for as long as possible to fill up his music box.
8-Bit Freddy: When he appears, wait for the dial to reach the center and Press “P” to deliver a pizza, miss this marker and he will disable your doors.
Fredbear: If you see his hat on the desk, click on it and look through the cameras until you see him to return it.
Plushbabies: Check the Prize Counter often, if you see that they are different positions, switch off the lights and then turn them back on.
Dreadbear: Check the First-Aid Camera Often and check for movement. If you notice he has moved, use the middle blast door to keep him out similar to the Beast. If he sneaks in the middle hallway however, stare him down and then play an Audio Lure back towards First-Aid.
Grimm Foxy: If you see his figurine on the desk, that means he is ready to attack. When you hear is footsteps, hide under the desk until he leaves.
Frostbear: Imagine Jack-O-Chica’s Mechanic, except for the office gets too cold. The Lower the temperature, the more likely Frostbear will Manifest. Activate the Heater to make him leave.
8-Bit Baby: At Random, a pop-up message will appear on your maintenance panel, select the “Antivirus” option to get rid of it.
Ignited Freddy: Shine your light on him to make him leave, Do this 11 times before 6AM However to prevent a game over.
Ignited Bonnie: Don’t stay on the same camera as him for too long or he will punch it. If he is in the office? Hide under the desk or he will punch you.
Ignited Chica: She hides behind a large Wardrobe and will remain there for as long as possible. If the Wardrobe begins opening, that means she is about to attack. On the Cameras locate the Phantom Cupcakes before the creaking Stops.
Ignited Foxy: If his figurine appears on the desk, that means he has climbed into the attic or is traveling to one of the doors. If he is traversing to one of the doors, check which side he is coming from with the Animatronic View similar to Lockjaw and use context clues to determine where he is. If he appears in the attic, look at the ceiling and shine your light at him.
Creation: He will manifest within the caverns and slowly begin crawling out of the pit, after that is when his rest-of-night mechanic starts, He will slowly progress to the your office by checking which Blast Door is broken, if he finds one, close the left and right doors if on the corresponding hallway or if it’s in the middle, shut off the lights. He may also send one of the Fallen Endos to attack, if you see them, activate the heater but be warned that this will also speed up creation. If none of the blast doors are broken, he will break one himself.
Nightmare Classic Freddy: If you hear his laugh, that means he has entered the music room. Guess which song he is playing on his Piano to make him leave.
Nightmare Classic Bonnie: The Robotic Voice will announce detection of movement in his stage. When this happens, head to the Music Room and play an Audio Lure in the opposite direction.
Nightmare Classic Chica: She will be within her stage and will remain dormant, that is until the power begins rerouting to her stage. Head to the Vent Control Room and reroute it back, during this time, the oxygen levels will deplete and could put at risk from Oxygen-Dependent animatronics, so make sure to equip the Gas Mask.
Nightmare Classic Foxy: If you see his figurine on the desk, wait for the robotic voice to announce a number. Walk to Pirates Cove and click the corresponding alarm.
Nightmare Baby: Check the Middle Hallway Often with your flashlight. If you see that she is present, blink your light at her until she leaves. She may have a chance to send the Nightmare Bidybabs to attack, if that happens, block off their vision once they reach the window.
Nightmare Ballora: Check on her stage once in a while, if you notice she has stopped spinning, click “Reboot Music” on your maintenance panel. The Nightmareena’s meanwhile will sneak in from the top vent, select “Playback Music” to make them leave.
Nightmare Funtime Freddy, Nightmare Bon-Bon & Nightmare Bonnet: He will manifest in the same hallway as Nightmare Baby, when this happens wait for him to speak. Shine your light at him first so he himself doesn’t attack, then do the same for Bon-Bon & Bonnet before they also attack.
Nightmare Funtime Foxy: If his Figurine is on the desk, that means she will appear in Ballora’s Stage. There will be a countdown that times his arrival towards the stage. View the Camera by the time the Countdown reaches zero or she will attack.
Nightmare Ennard: Check the Parts & Service Room often, if you see his mask his gone that means he is loose. Find him on one of the cameras and shine your light at him.
Babygeist: She will begin fading into the office once a while, when this happens give her a control shock to send her back.
AMIREAL: Check his stage once a while to see if he is broken or fixed, if he is in the broken form, stare at him until he returns back to normal. If he is in your office, click his nose to make him leave.
Golden Call: A Pop-up message will appear on your monitor, alerting the presence of a virus. There will be 4 numbers which correspond to a camera, head to the cameras in that order and select “Antivirus” on the Task Module.
Havoc Freddy: He will occasionally appears near the window and will enter from the left door, look away from him when he is at the door. Be careful though, After he leaves, he can also have a chance to break the window and may cause others such as Blank to enter through. So shut the Window door just in case.
Havoc Chica: Her Cupcake will dart across the screen similar to bonnet, click the candle to make it retreat. While the Cupcake itself can’t give you a game over, for every time you let this happen, Havoc Chica will start to close in from the Ceiling. At her Final Stage, one more miss will result in her attacking the player.
Havoc Foxy: If you see his figurine on the desk, head to the Pirates Cove Camera and look at the sign, it will display an illustration of one of the defenses (Doors, Vents, Buttons). Activate the Corresponding Defense and then look at him until he retreats.
Havoc Puppet: If you hear her music box start playing, find where her tentacles are sticking out from. After that, look for her head and stare at it.
Soulcage: Parts of him will slowly begin entering your office, after the 4th stage he will jump in your face and manifest in either the ceiling (Green hands come from above) or the Pirate Caverns Pit (The Robot Voice will alert of his presence). Head to the corresponding location and click each piece to disassemble it.
The B.O.A.: He will start off as a standard box of parts within the middle hallway, overtime each head will begin to take a melted appearance. Once he is in the middle of the hallway, stare at it to ensure it doesn’t move closer. Click each head To make it leave.
Garvey: Check on the safe room often and see if his face is present. If it’s missing, shut off the blast doors he is not approaching from. Once he is passed, activate the vent snare before enters the corresponding vent.
ASoF Freddy: There will be a system labeled “Backstage” and you will need to guide a little marker to the finish line. Time your movements carefully to ensure you don’t lose and start over. If you fail to complete it at 6AM, Well… Game Over.
ASoF Bonnie: Do not look at the cameras for too long
ASoF Chica: Do not stay off the cameras for too long
ASoF Foxy: If you see his figurine on the desk, walk to Pirate’s cove and flash him several times. Head back to the office before he attacks though.
Jolly: He will appear in a random doorway but will not attack, instead he will jam it and may let other enemies in. Play an Audio Lure to the corresponding side and then close the corresponding door before he charges in and actually attacks.
George: If you see him near the window, wait for him to leave and then close the right vent door. Do not close the vent door while he is present though as he might climb in immediately and damage it in the process.
Tweetie: She will appear in the elevator camera attempting to reach your office, if you hear a ding, play an audio lure to the secondary elevator. If she doesn’t respond, shut the right door.
Maxie: Similar to George, as soon as she leaves the vision of the window, close the left vent door. However, you must activate the vent snare while she is in the vent to slow her down before she damages it.
Antonette: Check on her wires once a while, if you hear an alarm and one of the wires is broken, click on it to repair it.
Classic Jolly: If you see him near one of the doorways, administer a control shock.
Classic George: If you see him inside one of the vents, administer a control shock.
Metal Foxy: Keep your oxygen as high as possible, If his figurine appears on your desk, that means one of the A/C Units have stopped working. Find the Unit that has broken and repair it before he gets out.
Chipomats 1, 2 & 3: Check the Left, Right and Middle Doors for the corresponding Chipomat, If 1 or 2 show up, simply flash them in their eyes. If they both show up or 3 is present, administer a control shock.
Killtimber: He will look in from the window often, when he does, shine your light at him and then look under the desk in the case he sneaks by until he leaves.
Summercrab: Her two Pincers will appear from the left and right and slowly get close to the center, when this happens, activate the steam lever to fry her wiring.
Seabilly.exe: At Random, he will begin walking across the window and then stop. When this happens, shut off the lights until he leaves.
Big Bruce Mk2: At Random, he will ask for about 5 wood, go the cameras and find said wood before he gets agitated.
Lost PNM: If you see an hourglass emblem manifest on the sketch board, shut off a camera to lure him out.
Lost Oswald: If you see his figurine on the desk, head to the caverns and shine your light at him. After that, head to the pirates cove camera and shut it off.
Lost Face: If you see his figurine on the desk, Walk to pirates cove and head into the caverns. Use your Night Vision Goggles to locate him and play an aggressive voice to lure him out.
Lost Undying: If you see his figurine on the desk, Walk to the Caverns and Stare at him. After that, head back to the office and play an audio lure to the cove.
H. Bound PNM: If you see him in one of the entryways, click the corresponding shock button to make him leave. Be careful though as the shock buttons may have a chance to malfunction and if clicked could cause him to return instantly.
Spirit Oswald: He will slowly fade into your office overtime, when this happens shut off the lights.
Undead Pluto: When he appears in your office, any music box or audio lure will begin to malfunction, shut off a camera to make him leave. He will also occasionally sneak into the Vent Control Room to mess with the oxygen. If this happens, activate the Plunger Room to Get him Out.
Jake: Check the window often for his prescence, if he’s there, shut off the lights and close the window door. If he instead appears in your doorways, shut off the saferoom camera.
Pete: If he begins appearing in the Vent Control Room, DO NOT GO IN, shut off the adjacent camera towards it and after that walk in to stare him down.
Ortensia: She is rather hard to spot so look carefully for her hat. If you see the hat in one of the cameras, activate the strobe lights to confuse her.
Hourglass: Similar to Mangle, Hourglass will appear inside the vents and can only be defeated via vent snare. However, as soon as he gets into the office, hide under the desk and he will leave.
Slester: Check on the desk for any spikes, if you see one, that means Slester will be waiting for your entry to attack. Shine your light at him to make him leave.
Mortimer: Check the broadcasting room once a while, if you notice that the TV Screens are on and he is present, keep the global music box on until it stops.
NSM: Check on your heart rate once a while, if you notice it has began rising, that means NSM Is hiding in the office. Check either the desk, hallway lights or the vents to track him down. Even when not active, he will attack you regardless once the Heart Rate has reached a critical level. You can make it go down by looking at the cameras, defeating an enemy or holding YBF.
Lost Hourglass: He will hide within the caverns often, every once in a while though the monitors in your office will begin acting up. When this happens, walk to the caverns and stare at the pit until the Red glow reverts to Blue.
Myster Mouse: Check on the cameras near Mascot Prep, if you notice his head is missing, hide under the desk before it attacks.
Corruptus: He will appear in multiple locations, particularly the starting cameras for PNM, Face & Mortimer. If he is PNM’s camera (Mascot Prep) Shut off a Camera, If his Figurine is on the Desk, head to Pirate Caverns and shine your light at him. If he is in the Broadcast Room, activate the Global Music Box.
True Mickey: Defeat him on the Arcade Room before 6AM Before he jumpscares you, resetting the timer back to 12 (Dont Worry, your progress on the mini game will still count)
George The Eyesore: If you hear him growl, walk into the caverns and shine your light at him. If you hear him exclaim “MY STOMACH RUMBLES”, shut off the kitchen entrance camera so he could feed.
Expectation Fredbear: He will appear in your office slumped over and will remain inactive for a while. However, he may occasionally begin standing up, when this happens, give him a control shock.
Logbook Chica: She will crawl throughout the vents around your office, shine your light into one of them to scare her off.
Monster RAT: He will slowly enter the office from the dark in the middle hallway, waiting to enter the office to attack. To ensure he doesn’t reach it, play your cassette tape to ward him off. Be careful though as the tape may get an error that would need to be fixed.
Monster CAT: He will hide underneath the table and wait for the player to enter so he could attack, when this happens look at the table and shine your light at it. Failure to do so in a while or entering the desk without the light will result in game over.
Monster Vinnie: If the Global Music Box begins malfunctioning, Head to the Music Room. Shine your light into his eyes several times to disorient him, once that is done, reboot the GMB To ensure he doesn’t wake up.
Tortured Bonnie: She will traverse the vents attempting to reach the office, VCR or Pirates Caverns. When you see she is entering in those vents, either avoid heading towards the room or evacuate it before she attacks. Wait for the sound of loud footsteps that indicate she has left
Tortured Chica: She works the except same as Tortured Bonnie, except you must instead head to the room she is in. Once there, click on her eye to disorient her.
Tortured Buster: He will be seen in the arcade playing ‘Five Nights With Sugar the Cat’. Due to his sharp fingers puncturing the buttons, you must play the game for him. Click one of the three circles to close the door that sugar is coming from, If you fail to do this and the camera shows the arcade machine in pieces… Prepare to face Buster’s Wrath.
Nightmare Fuel Lockjaw: If you see him walk across the hallway or enter into your office, activate the steam lever to confuse him.
Nightmare Fuel Bonnie & Nightmare Fuel Kitty Fazcat: Similar to Koly & Sally, These two are easily fooled by the locker. However, Bonnie will stand really close to the locker and remain until it opens. When this happens, shine your light on her eyes to deter her.
Nightmare Fuel Freddy: When active, there will be a lever and a countdown meter. When this meter gets low, hold your mouse on it. If the meter gets to zero, he will begin his second mechanic where he will slowly advance towards your office. A Second Meter will appear that you need to fill before he approaches, once full, activate the steam lever and he will leave you alone for the rest of the night.
Granny: She will be attracted to any noise originating in your office. Normal defenses will not work, so you must either use the audio lure or hide under the desk to throw her off.
Baldi: You will get a notification about a virus in your monitor, to get rid of it, solve the math problem provided before the timer runs out.
Principal of the Thing: If you hear his whistling, open both doors so he won’t send you to detention.
Monika, Yuri & Natsuki: These three will be in the clubroom writing poetry, every once in a while Monika will head outside and may drop by the office looking for some supplies. Collect as much paper and ink as you can and she will return. Yuri & Natsuki will also occasionally leave and may enter the office as well. For Yuri, hand her some fazcoins so she could purchase some tea, and for Natsuki hand her some food from the kitchen. If you fail to these though, they will enter an aggressive mode until they are stopped. For Monika, play the Global Music Box to calm her down. For Yuri and Natsuki, shine them in the eyes and they should go back to normal.
Sayori: Make sure to keep her happy for as long as possible, if you notice she is feeling sad, head to the club room camera and activate the microwave to cook some cookies that Monika had placed for her.
Stylized Springtrap: Similar to his normal counterpart, check the vent opening often and look for his face. However, do not close the vent door as he will break it. Instead, let him in and then play an audio lure to the Vent Control Room.
Funmare Freddy: Check which hallway he is in, if he sends Bon-Bon to Attack, close the corresponding door. If he announces a surprise, close the opposite. If he laughs though, shut off the lights so he himself couldn’t locate you.
Twisted Nightmarionne: If you his music box, listen for where it is originating from and play the “Local Music Box” in said spot.
Glitchtrap: He will randomly manifest for a few moments and disorient your vision, there is no way to stop him.
Kyle: Just like DeeDee, Kyle will summon a random character. There is no way to stop him.
Kyle’s Roster:
Unwithered Lockjaw: He will stand in your office deactivated, that is until the noise reaches 10%. At this point, he will activate and move out of the office into the Music Room. When this happens, set the volume of the Music Box to MAX to overload his audio systems before he attacks.
Hatman: Throughout the Night, you will catch a glimpse of him in one of the cameras or in the many rooms you visit. If he appears, stay away from him or he will block your vision with his hallucinations.
Nightmare Joe: He will appear in the middle hallway out of sight, when his eyes begin shining, light up a flare to scare him off. If the eyes on the Toxic Head begin lighting up however, use the UV Flash.
Chibis: The Four of them will slowly spawn on your desk, if the Monika Chibi (Stage 4) is Present, shine your light at them to scare them away.
Tortured Puppet: He will slowly materialize within the Music Room the longer the Global Music Box isn’t on. Activate it to make him vanish.
Tortured Kitty Fazcat: Her Jaws will slowly begin to close on to the player, when this happens turn on the heater to make her leave.
Tortured Device: The Robotic Voice will begin to announce a number starting from 5 to 90, this indicates how active the Device is. When this happens, you will 100 seconds (minus the number announced) to locate it and recontain. Failure to do so will not mean game over, as he will instead disable each system one by one, ending with the power.
Golden Lockjaw: Every Hour, he will begin to appear in your office ready to attack. Hide in your Locker to deter him.
Nightmare Baldi: He will manifest within the clubroom with the chalkboard bearing a math problem. When this happens, search the cameras for the corresponding number balloon before the hour changes.
Undead PNM: Similar to Scrap Baby, Undead PNM Will appear behind the desk and will occasionally move. When this happens, hide under the desk to confuse him.
H. Bound MickMick: At Random Intervals, he will manifest in front of your vision and will attempt to strangle you, press the space bar repeatedly until he goes away.
Jack: Just make sure he doesn’t do any rule-breaking activities, or he might end up raising the AI of a random character.
Drawkill Freddy: If you hear his laugh, that means he is hiding in your offfice. Look around for his tophat and click it before he attacks.
Smike: He will fill the cameras with pop-ups stating a random FNAF Fact, click them to make it leave.
Dawnbreaker: At Random intervals, a purple aura will begin to cover your screen. That means Dawnbreaker has been awoken and must be located, Click on his eyes to confirm his location. Be careful though as he might set up fake eyes to trick you.
Molten Evil: At Random, your vision will be swarmed with ectoplasm, when this happens look at the ceiling.
39: If he appears in your office, click on his nose to make him leave.
Tortured Vigo: He will wander around and will disable various A/C Units temporarily, putting you at risk from Oxygen deprivation or Metal Foxy. You can prevent this by locating him, as this will cause him to temporarily hide himself.
Fixed Strongman: If you happen to see him in your office, shut off the lights before he attacks.


0 comments