

Here’s the steps for Y’all to follow:
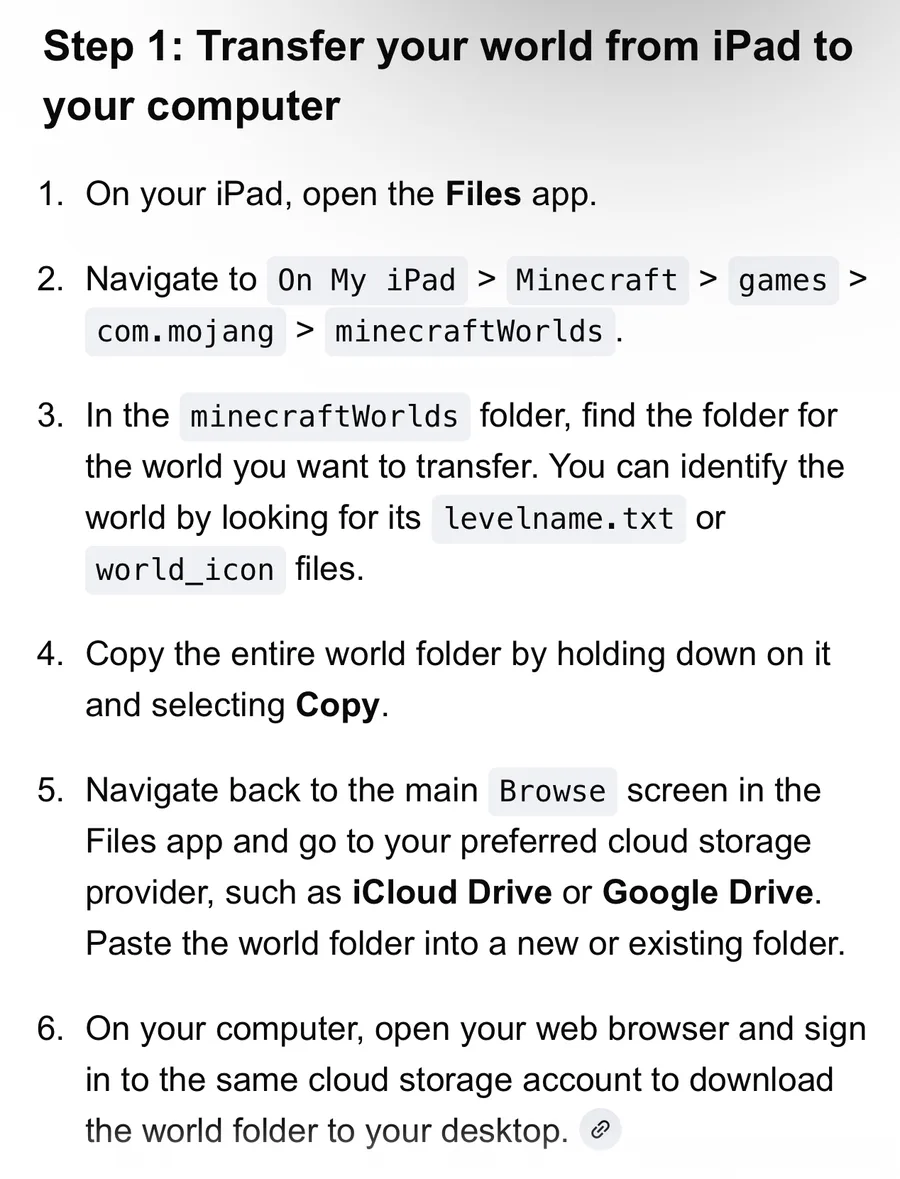
1. Locate World Files on iPad
Your Minecraft worlds are stored deep within your iPad’s local storage.
Open the Files App and navigate to: On My iPad > Minecraft > games > com.mojang > minecraftWorlds.
Each folder inside is a world. To identify which is which, look for the
levelname.txtfile inside each folder, which contains the world's name.Compress the world: Tap and hold the specific world folder, then select Compress. This creates a
.zipfile that is easier to move.
2. Transfer to PC
You need to move this .zip file from your iPad to your computer.
Cloud Storage: Upload the
.zipfile to Google Drive, Dropbox, or iCloud.Direct Transfer: Alternatively, you can plug your iPad into your PC and use tools like iExplorer or iBrowse to drag the files directly to your desktop.
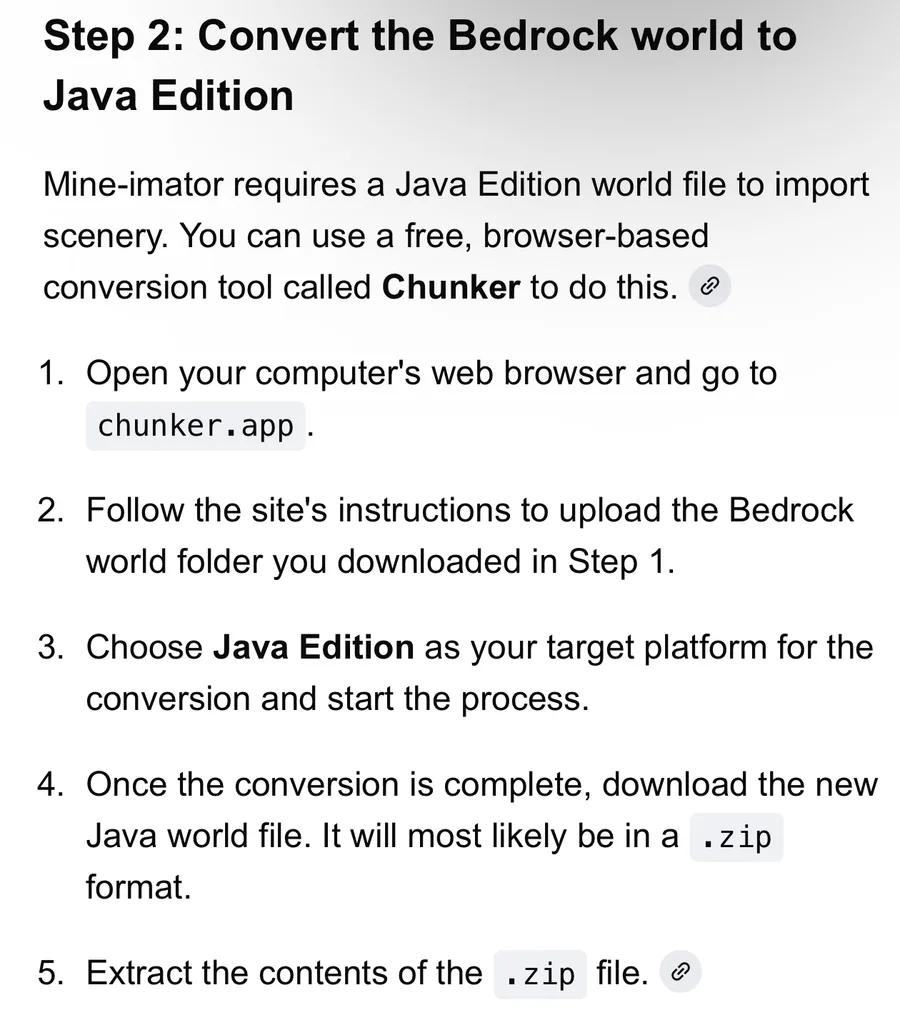
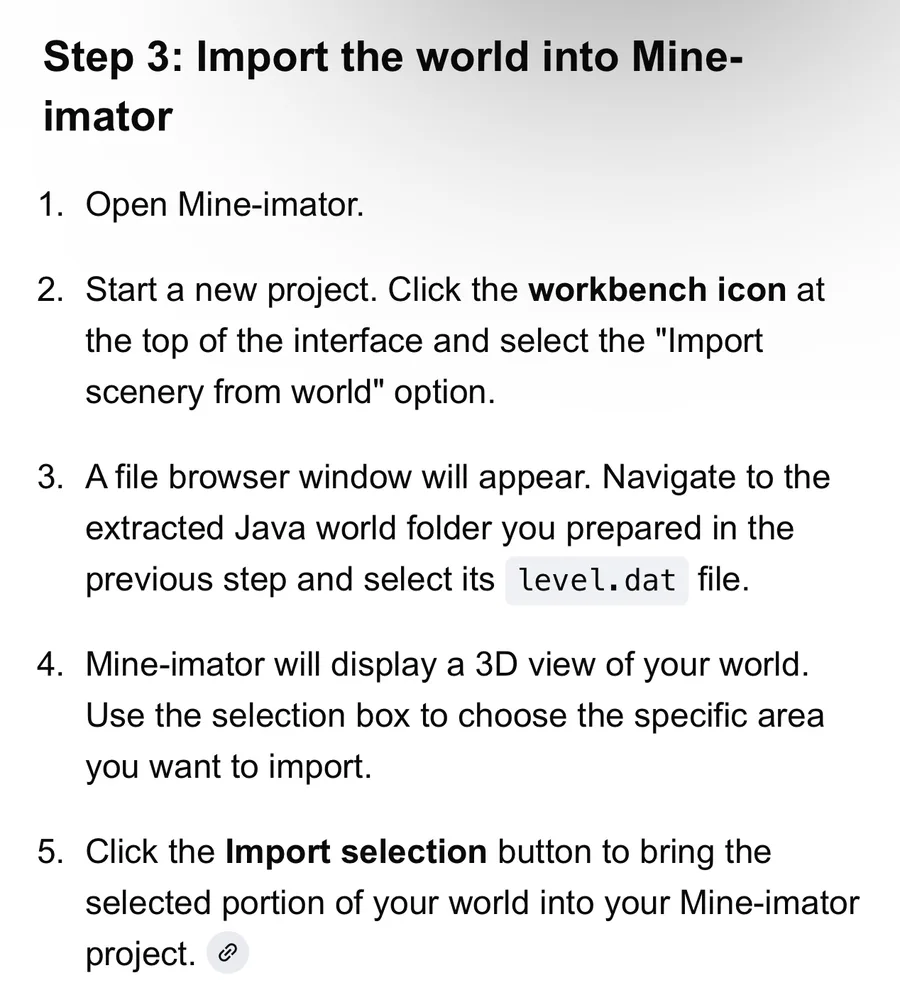
3. Import into Mine-imator
Mine-imator primarily uses Java Edition world formats. Since iPad uses Bedrock Edition, you may need to convert the world first if Mine-imator doesn't recognize it directly.
Conversion (If needed): Use a tool like the Amulet Editor to open your Bedrock world and save it as a Java Edition world.
In Mine-imator:
Open Mine-imator and click the Workbench(crafting table icon).
Select the Scenery icon (terrain/grass block).
Click the Browse button next to "Minecraft world" or "Schematic".
Navigate to your transferred world folder and select the area you want to import.
Note: If you are using Mine-imator 2.0 or later, it has better support for direct imports, but converting Bedrock builds to Java format remains the most reliable method for older versions.


0 comments