We have received a lot of awesome fan art lately, and some of you asked for reference pictures to draw the Masked Kid and other characters.
So we thought, why not go a step further and make a little tutorial thingie!
So here it is, a step by step how to draw tutorial for the Masked Kid, let’s get started!
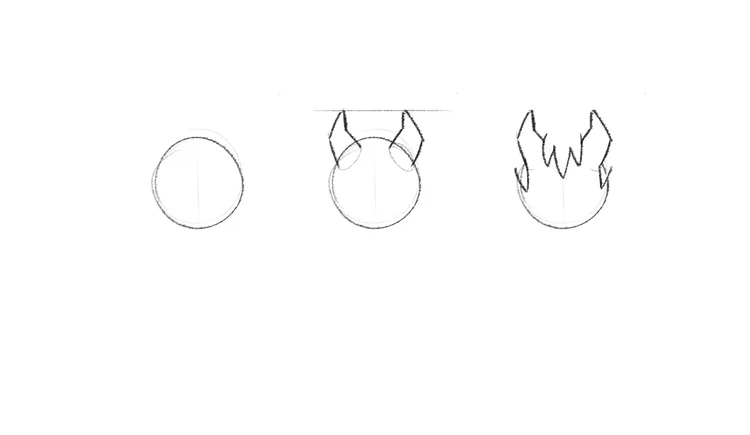
(Follow the image from left to right!)
Step one, draw a good’ol circle. Doesn’t have to be perfect, as you can see I made a very sketchy one and it works just fine! I added a faint vertical line as a guide for the face.
Next we add the horns, I usually draw two smaller circles on the top there for reference and continue with the shape. The horns are usually tricky (and I’m guilty of not keeping them very consistent) but as long as you remember not to make them too huge or thin it should look good.
Now I add three strands of hair between the horns, the middle one is usually longer. And two more on the sides (sideburns?).
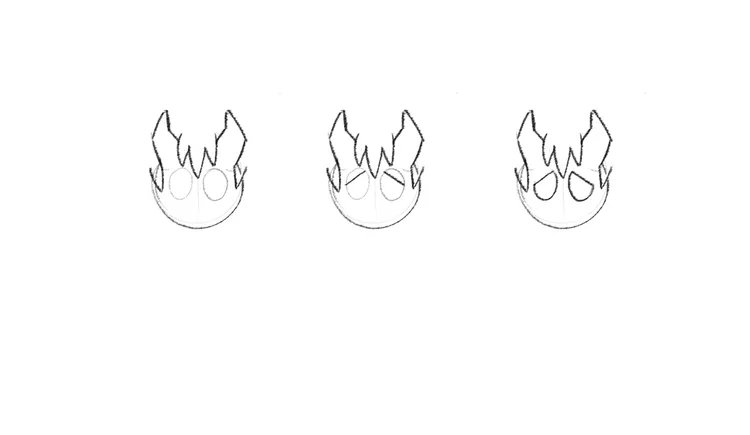
For the eyes make two oval shapes first, then strike through the ovals with the saddest of lines. Now erase the unnecessary parts and there you go! Remember, the eyes are more like tear drops than perfect circles.
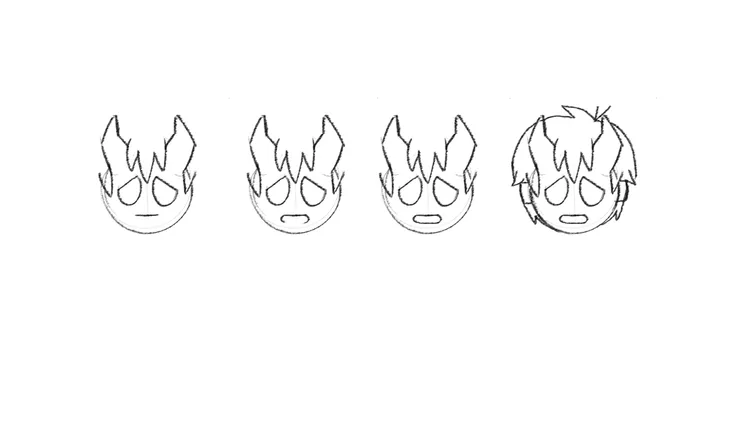
For the mouth I go with a straight horizontal line first, then make “c” shapes around the edge of the line for the thickness.
Hair is a bit messy, but I usually start with a basic round shape for the hair, add the mask strap and continue with the spiky strands of hair. They have a bit of anime hair going on in there, so don’t sweat it if the spiky hair is not very consistent through different views.
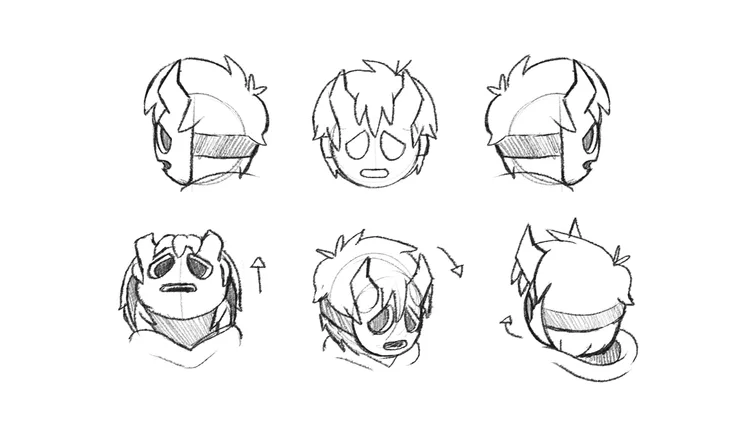
And now the head is ready!
Here is a bit more reference for the Masked Kid’s head looking in different directions.
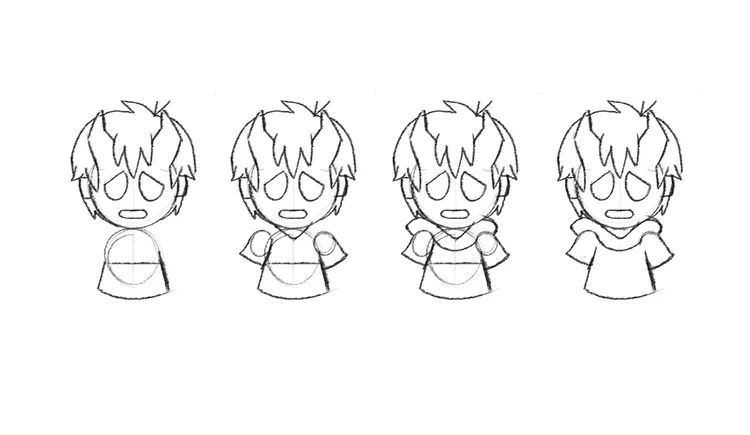
The basic shape of the body is a circle and a curvy rectangle for the lower part of the clothes (If you were to see this from the side it would look more like a bean, you’ll notice it later).
For the shoulders, make an inclined bell shape (as you can see, it starts off a circle too).
And resting on the shoulders add the neck of the hoodie, it has a V shape. And then we clean the guidelines.
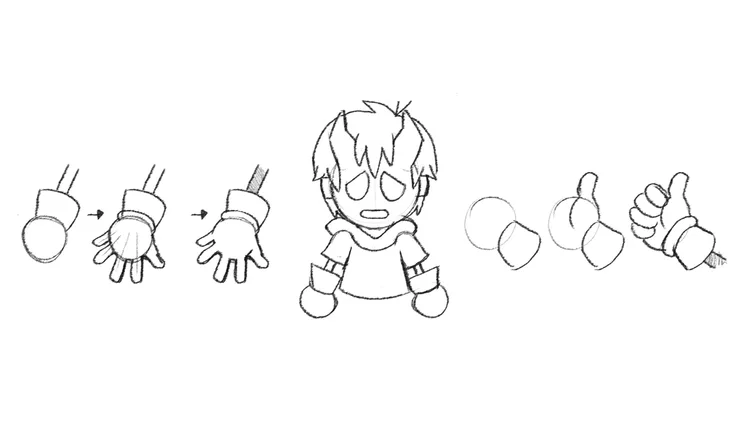
I’m personally bad with hands, but like everything else you get better with practice. For the MK I just make them circles and add details later. The fingers are very noodle-like and cartoonish. I always leave the ring of the gloves for last. Also, the MK arms are usually very thin and noodly too.
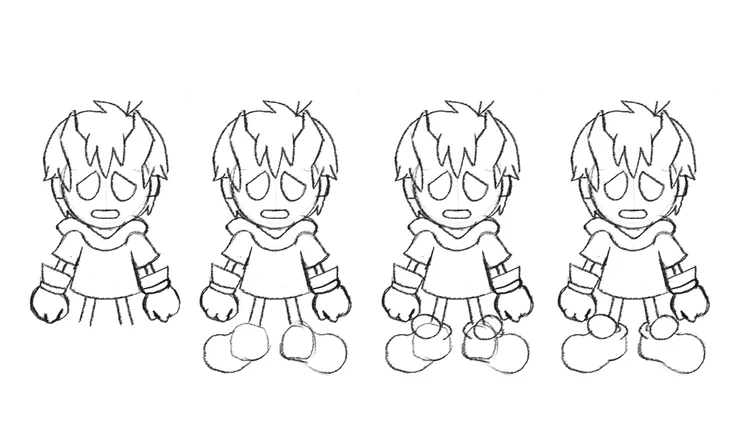
Shoes I do love to draw!
First the thin legs.
Then, square-ish shapes for the heels and work your way from there for the rest of the foot. The shape is similar to a bean too.
Add the circles on top of the shoe, and the ring shape for the hole of the shoe.
Clean it!
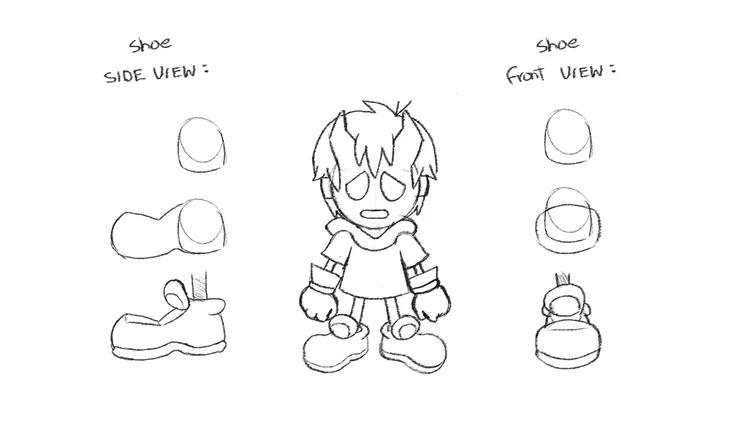
Here you’ll notice I added more details for the shoes, like the soles.
Plus more reference for the shoes in side and front view.
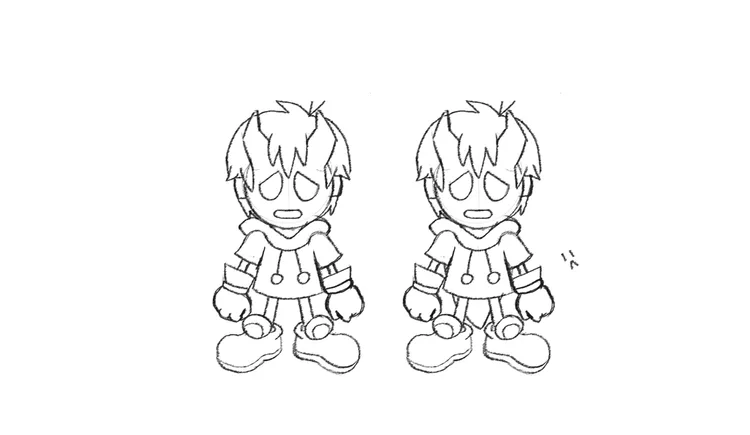
We are almost done here, we now add the little strings of the hoodie with a little ball on the lower end.
And now we add the characteristic long hood of the Masked Kid’s hoodie, but as you can see in this view it wouldn’t show much :(
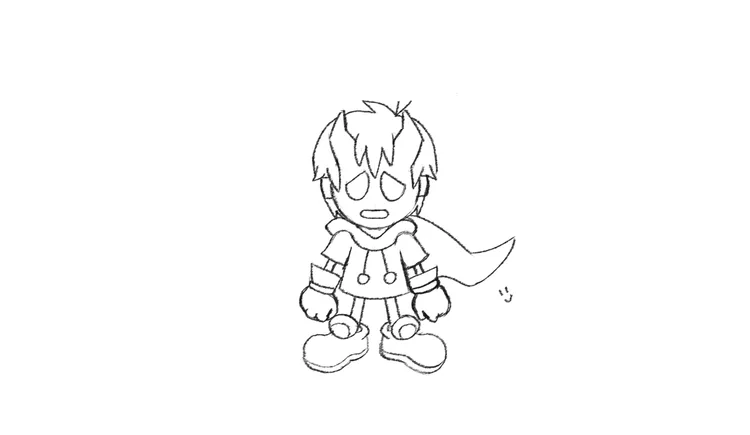
But hey! Don’t be afraid to break the rules a little bit and make the hoodie appear anyway. Let’s say it was windy…
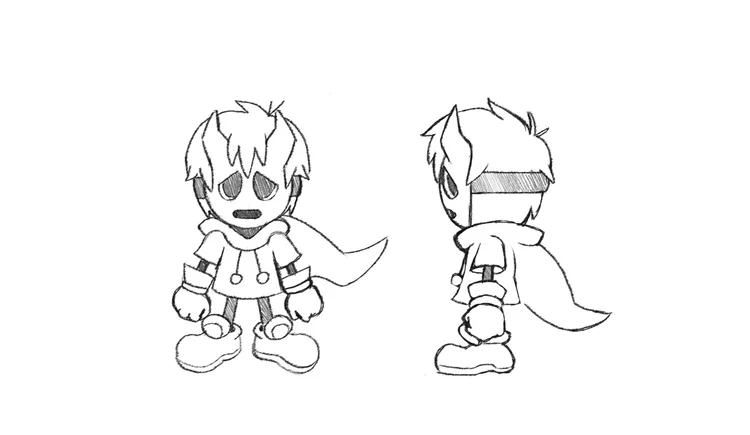
And we are done!
I shaded the dark parts and added a side view of the full body for reference.
Plus you can see the shape of the hood better now :)
But wait, something is missing.
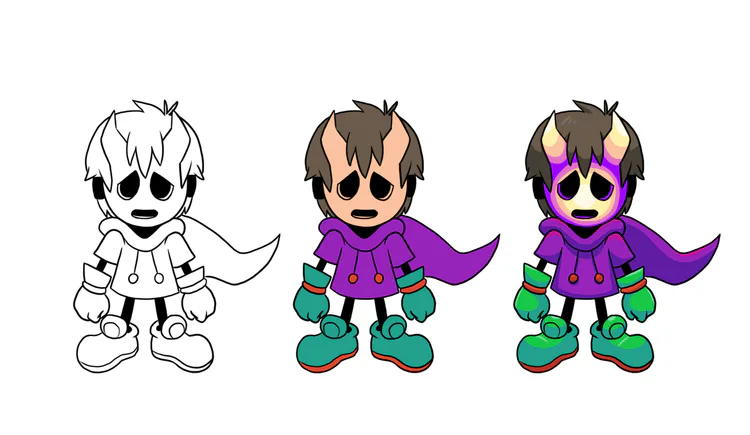
Let’s throw some color in there!
( I inked the drawing for this by the by)
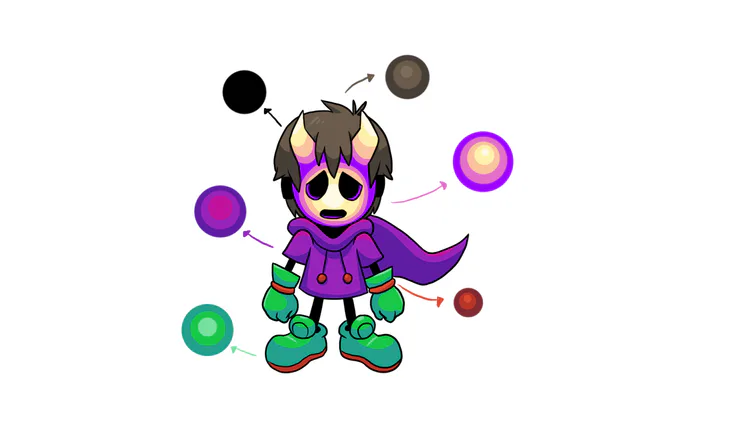
And if you were wondering about the colors, here’s a quick chart for color picking in your preferred drawing program.
And that’s it!
Wow that was long.
If you want to send some fan art our way don’t forget to join our discord!
We have a channel just for that!



2 comments