The controller button configuration provided with the base game works with most controllers. In some cases, however, the button configuration will not work.
In this simple tutorial, we will switch the buttons used in the game by changing the settings.ini file that comes with the game.
Step 1: Open the settings.ini file
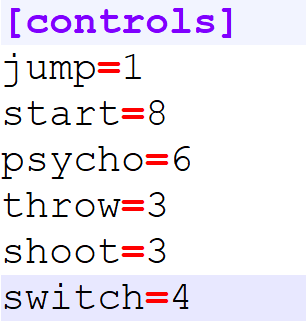
I believe this is self-explanatory. The names of the values (jump, switch, etc.) refer to what the buttons do.
jump - For jumping
start - To start the game
psycho - Silver's psychokinesis
throw - Silver's psychokinesis throw
shoot - Shadow shoot
switch - Switch characters during the final battle
But what are the values next to them? (1, 8, 6, etc.) These correspond to values we'll get to in a bit here. To find these, hit the Start menu or the Windows key.
Step 2: Find the button values
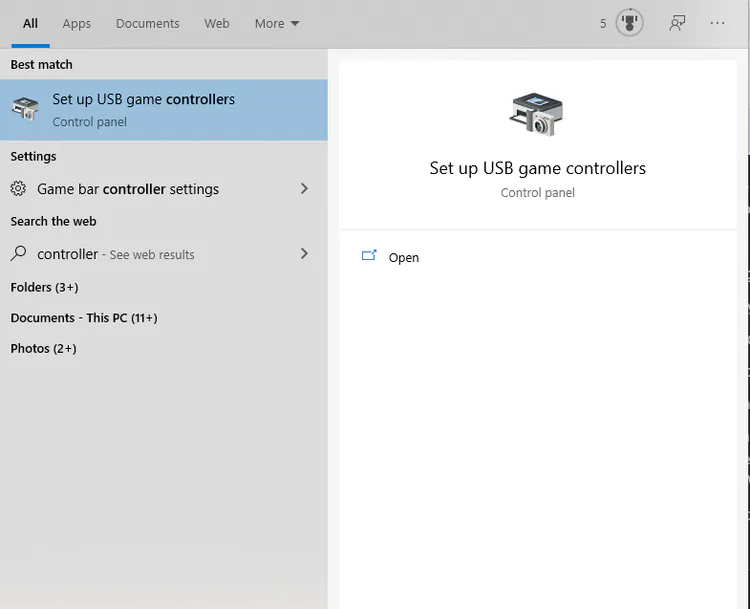
Search 'controller' in the Start menu. You should find this first option shown above. Click it.
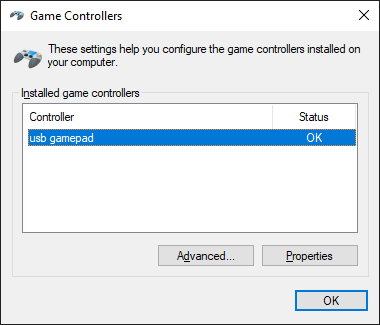
In this window, you should see a list of controllers available. For this example, I'm using a SEGA Genesis USB controller. Highlight your controller and click 'Properties.'
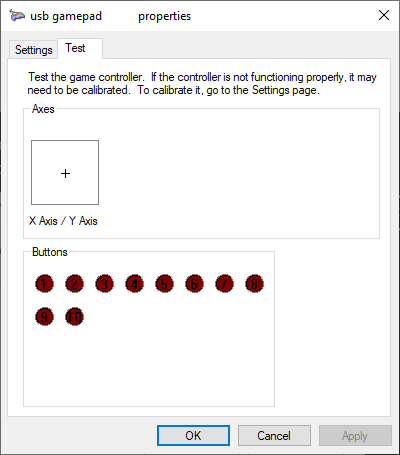
You should see a group below that has the title of 'Buttons.' Underneath, when you click buttons, they will highlight on this list below. As an example, I press the 'A' button on the Genesis controller.
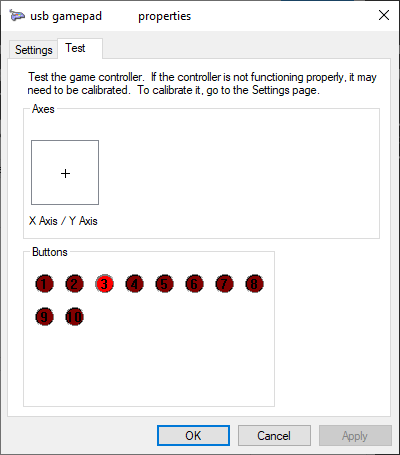
As we can see, button number 3 highlights. That means I go back to the ini file from before and replace the 1 with a 3.
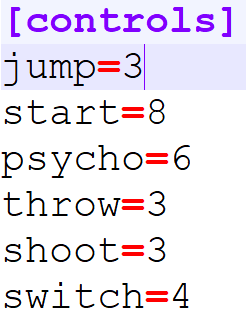
Repeat this for every button on the list to suit your needs. Enjoy!








1 comment