Introduction:
Greetings,
You might have wanted a simple Topdown movement that gets the job done in your project, though you probably relized that the built in "Eight directions" movement sucks in terms of collisions, it can drag on walls or bounce, pretty inconsistant and buggy
That's why you mostly have heard of someone telling you "just make your own movement"
If you never done any custom movement before and want to get started hopefully this guide will help a bit :)
X and Y axis:
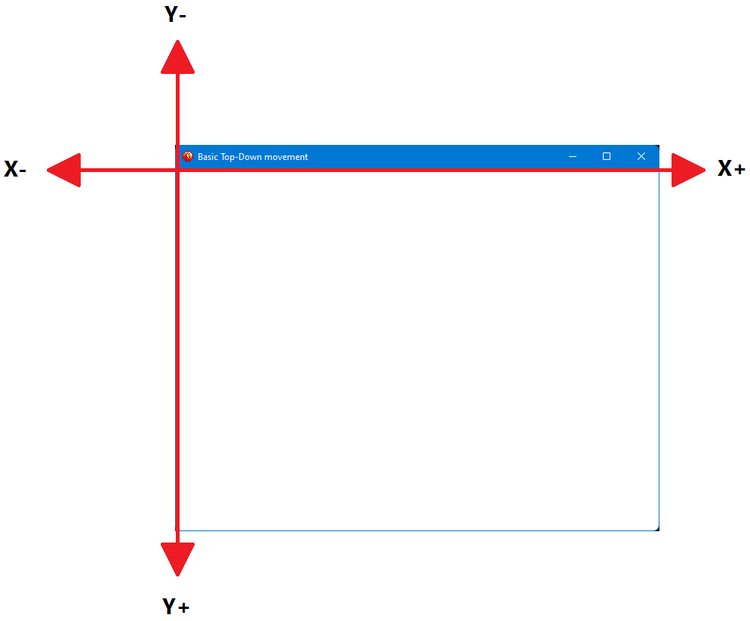
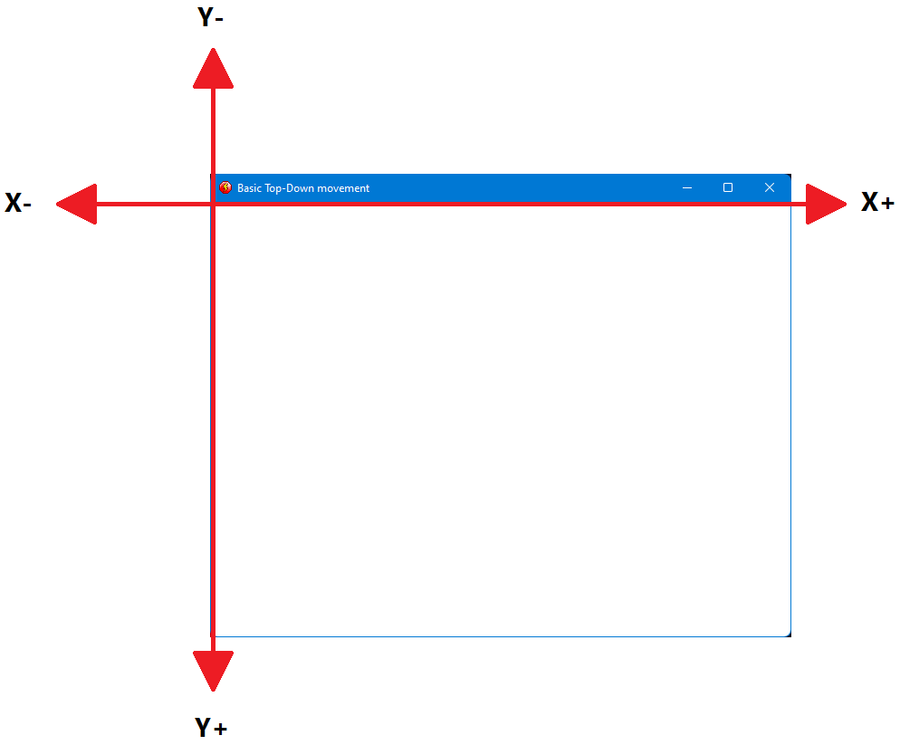
You probably already know about X and Y axis from elementry school, in Fusion they represent position of objects in the frame
X: horizontal
Y: Vertical
The more you increase the X axis the more you go to the right side and vice versa
you probably know that when you decrease Y you go down, but Y is actually flipped in most engines (Including Fusion2.5)
So if we simplfied it:
X+ goes right
X- goes left
Y- goes up
Y+ goes down
Basics of movement:
So first of all we add an Active object into the frame, this what we will be controlling:
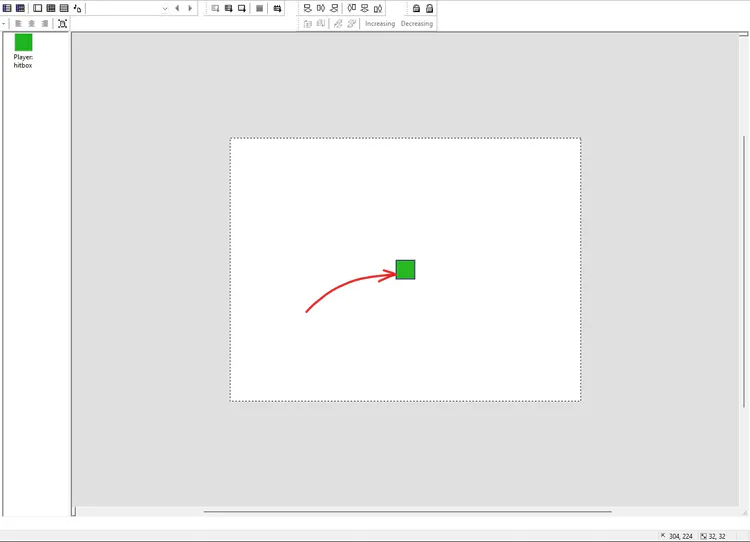
So to get started we want to move this object to the right direction
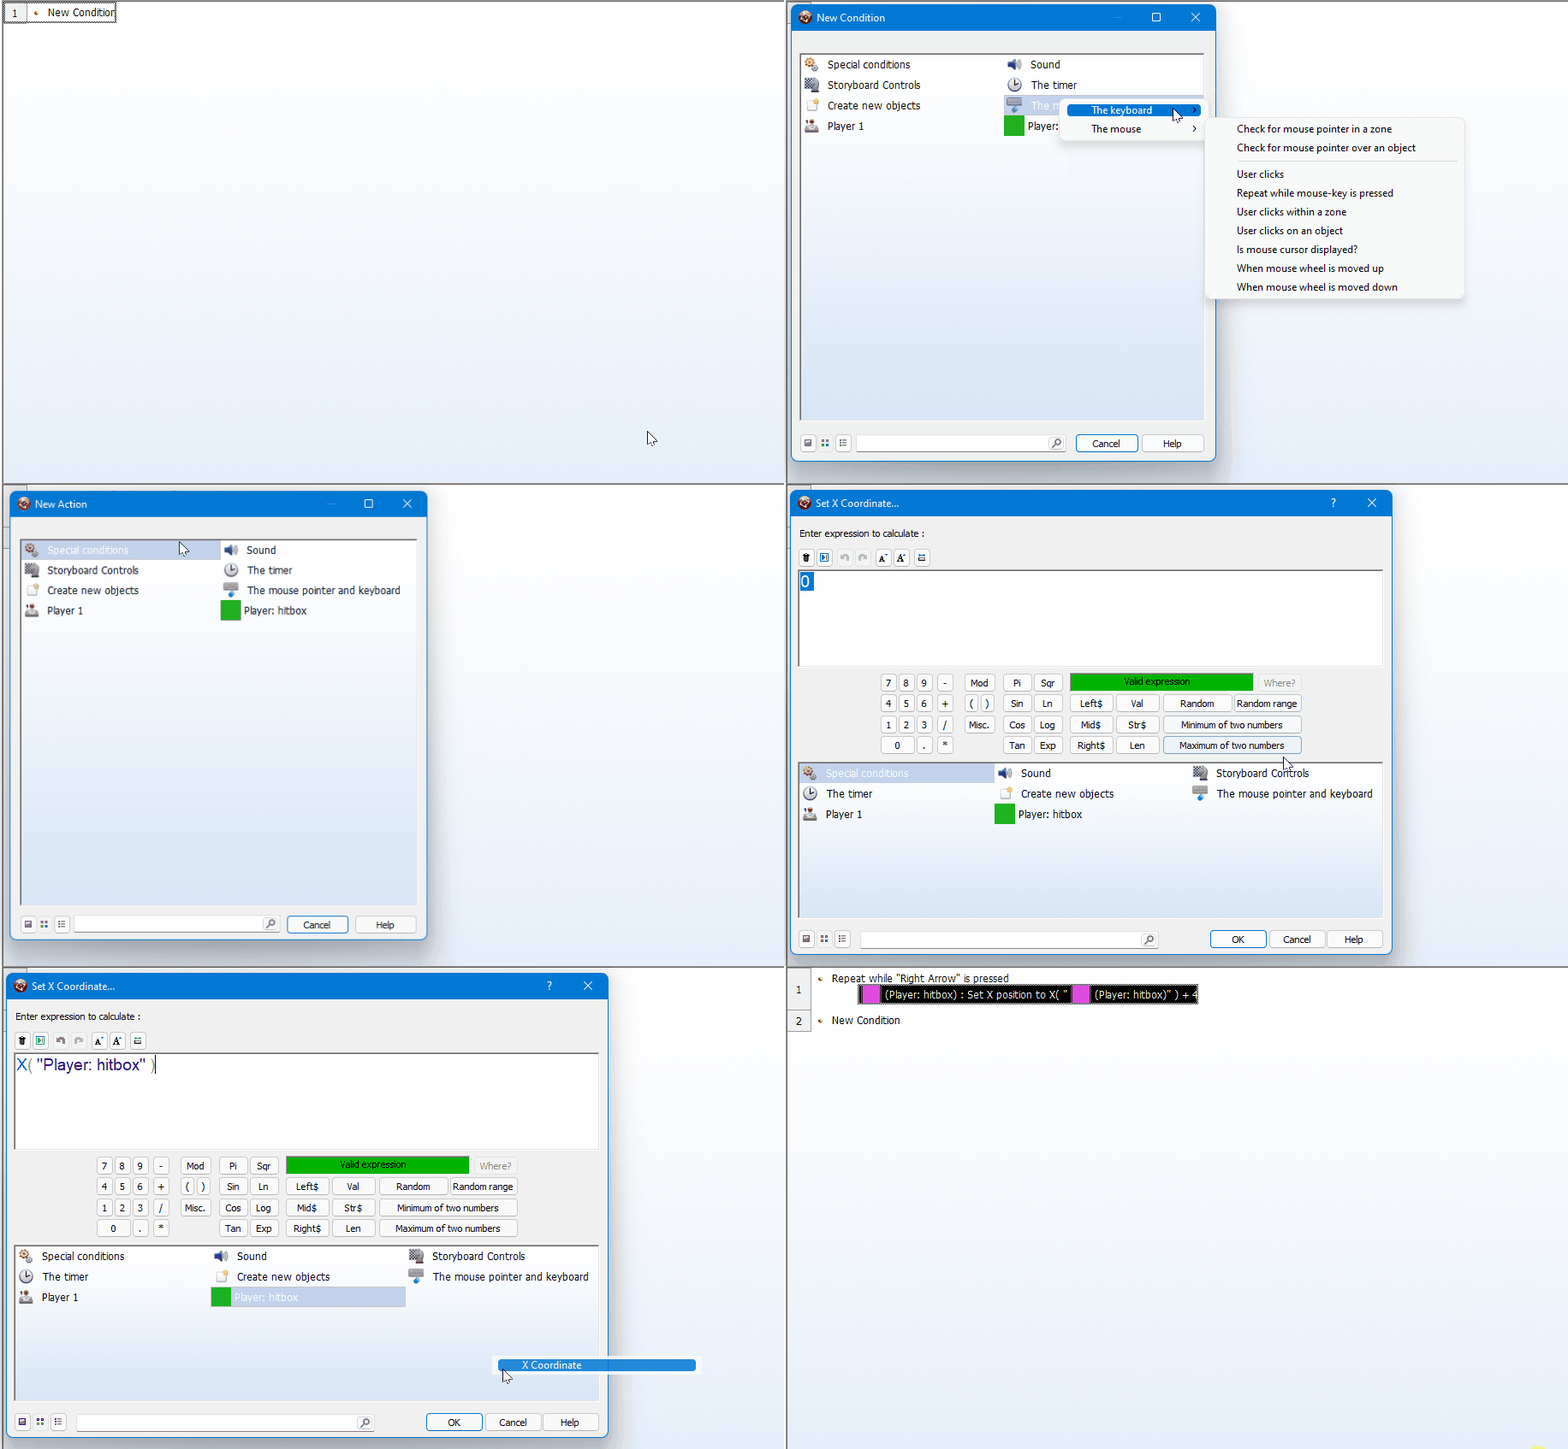
To do this we already know that X+ means heading to the right so we would basically be
Setting X axis to it self + the amount of pixels to bypass
we can move it by something like 4 pixel so it would beSet X Position to X Position + 4
we can make this only happen when we press and hold the "Right Arrow" key

Now after repeating the same method with other direction you should end up with something like this:
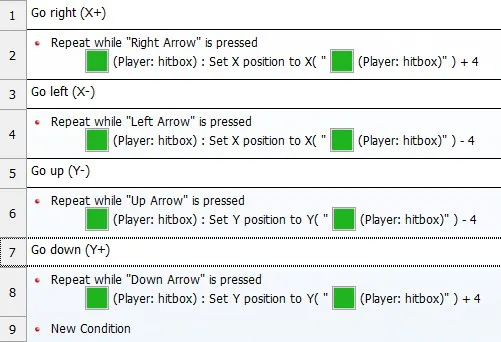
Run the project and you should end up with an object that can go to move to all 8 directions!

Now after that is done you can find that when you want to the change the speed of the movement you are required to go through each event and change the number, which is highly unintutive and can only get you so far
That's why you should use Alterable Values for this!
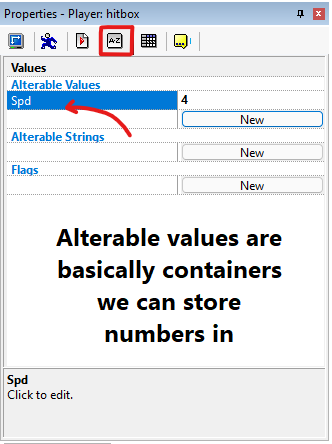
Thes are basically containers that can hold numbers in memory, imagine them as labled boxes that you can retrieve or add stuff to at anytime
In our case we want to hold the player's speed, so create a new alterable value for "Player: hitbox" and name it "Spd" (speed in short) then set it's value to the speed you want
After creating this value we should alter the previous events to utilize them instead, here an example of how you can replace it:
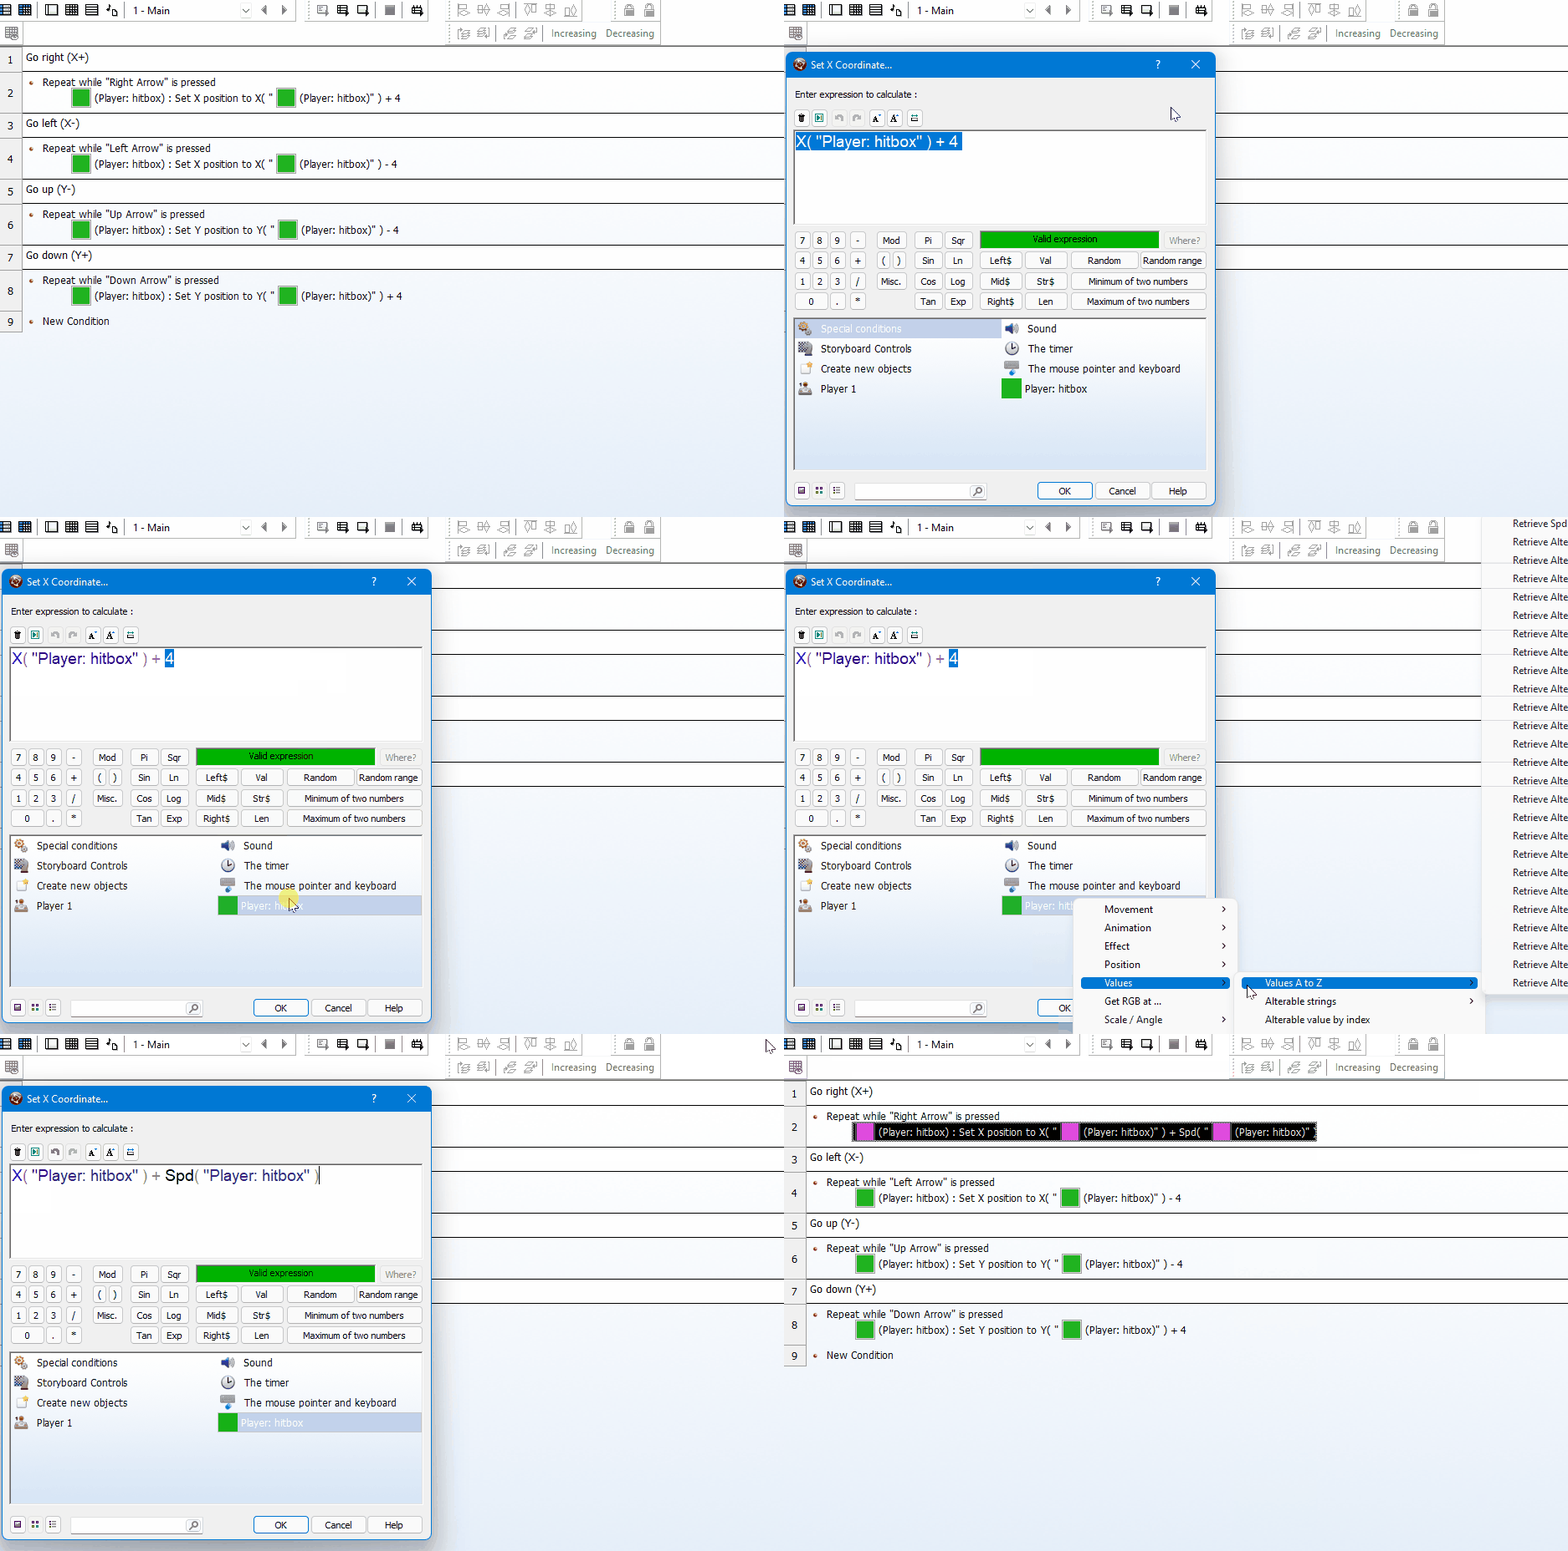
repeat the same process for the rest and then run the project again to make sure nothing broke from your last successful run
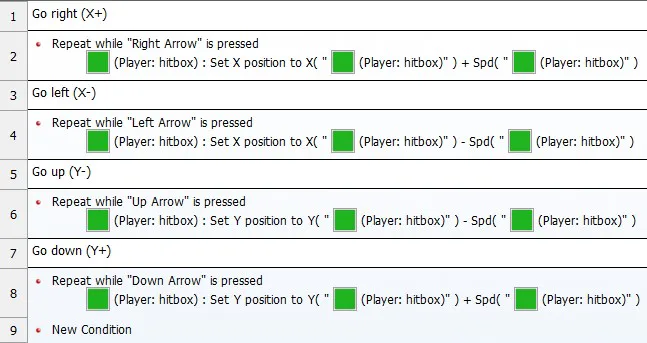
Now you can edit this value at anytime pretty easily
Collisions:
First add another Active object as the obstacle blocking you, and make a simple testing room with it:
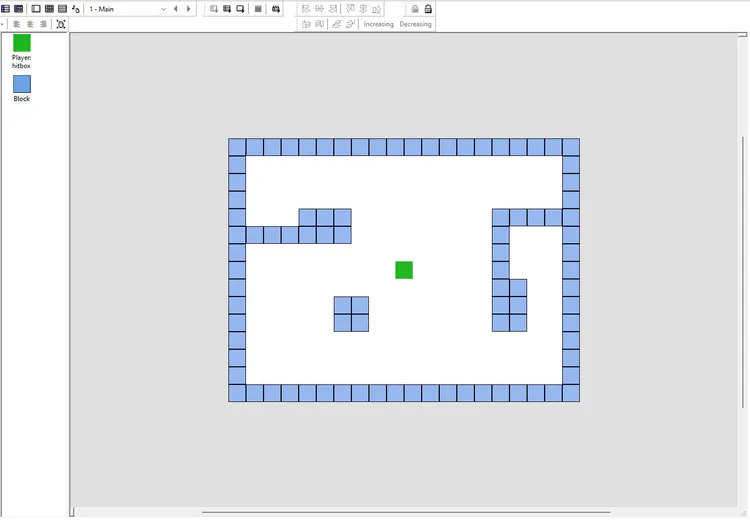
The basic idea of collision is push away an object from obstacle in the opposite direction it collided with
In other terms it's basically Newton's second law
by now you might think an event like this will work without a problem

But sadly no. as It can leave a gap when colliding with an obstacle, the reason it happens is mix between player's speed, it's initial position and obstacles position
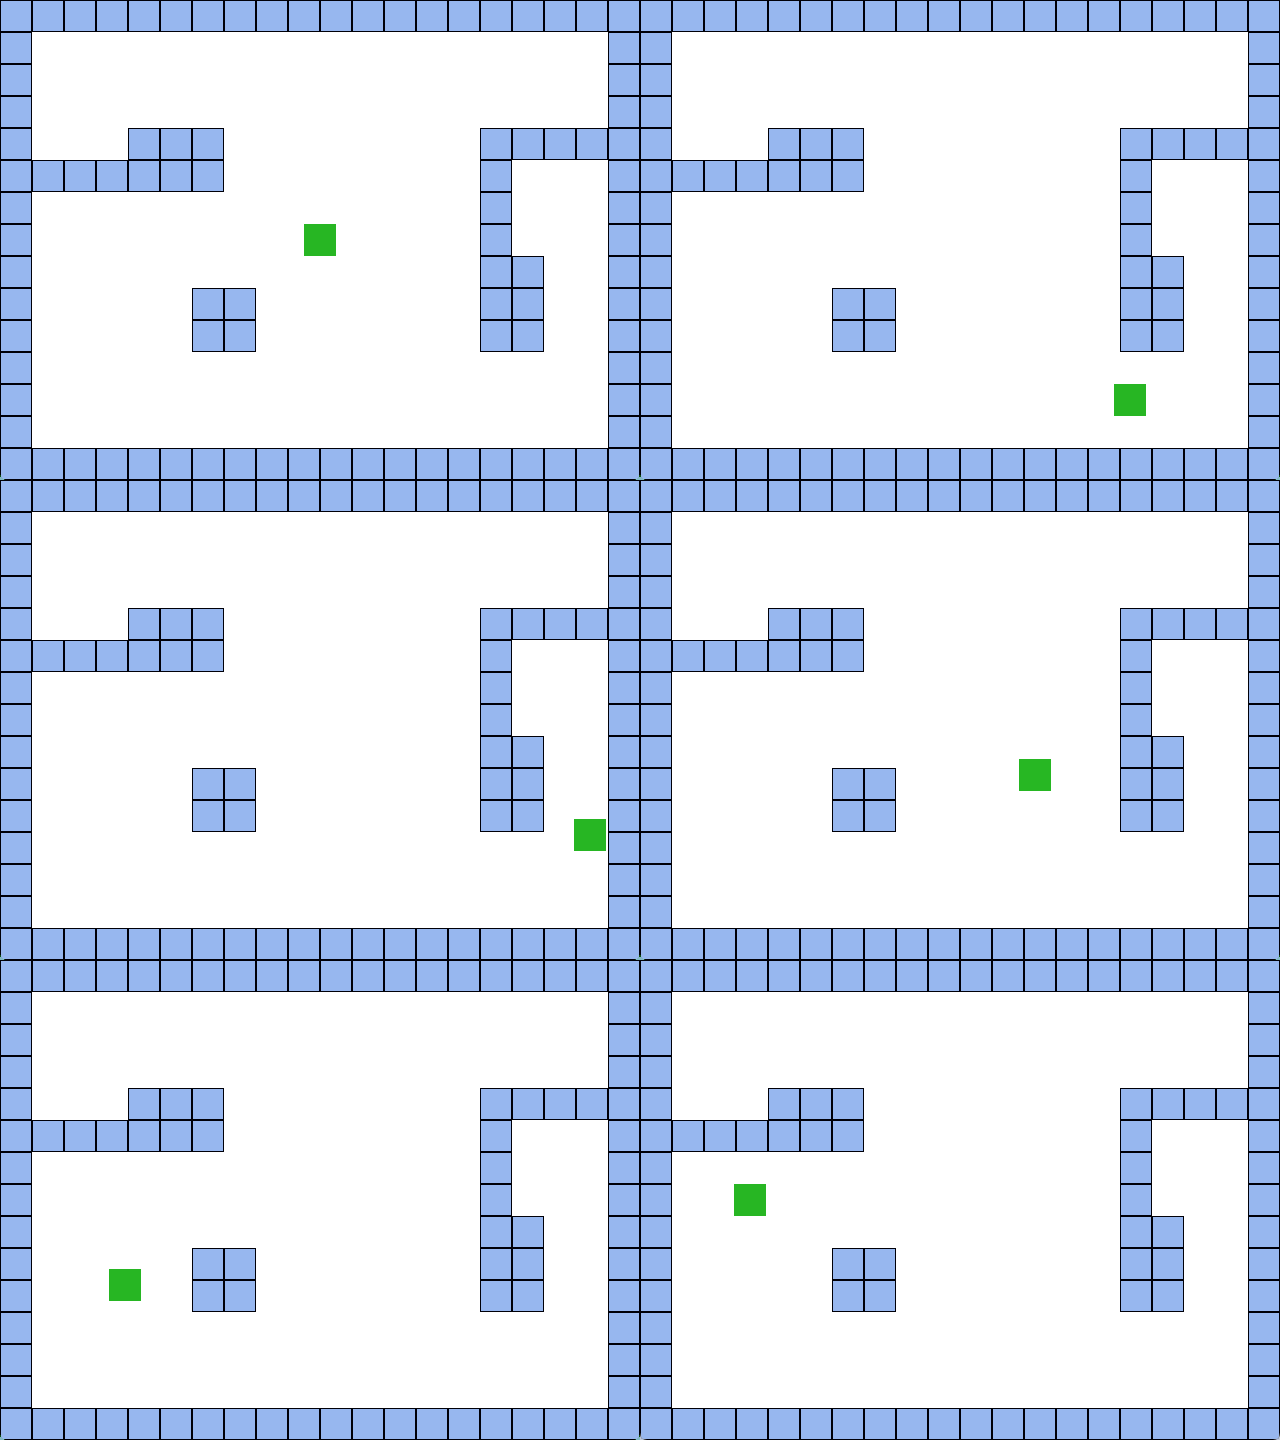
We don't have to worry about this though, what you need to know that it is happens mostly because we are "teleporting" the player on collision instead of passing it through every collision check then moving it by 1px
To solve this let's say the object is moving 5 pixels per frame, then we basically do this:
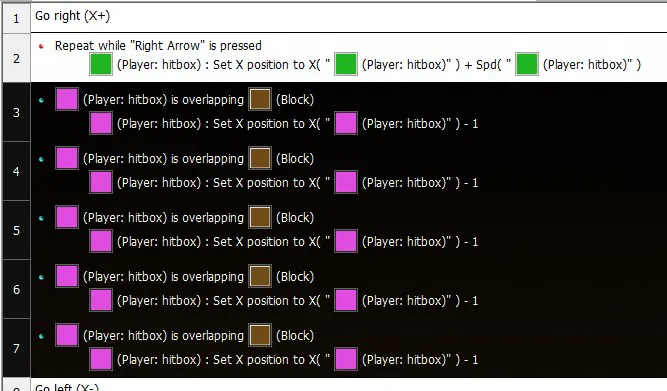
As you might have noticed the object moves only my 1px but the same event is duplicated 5 times
that means that each frame these will be all excuted at once and will check the collision for 5 times, which results in passing the positions before the next frame renders instead of teleporting a given amount of pixels
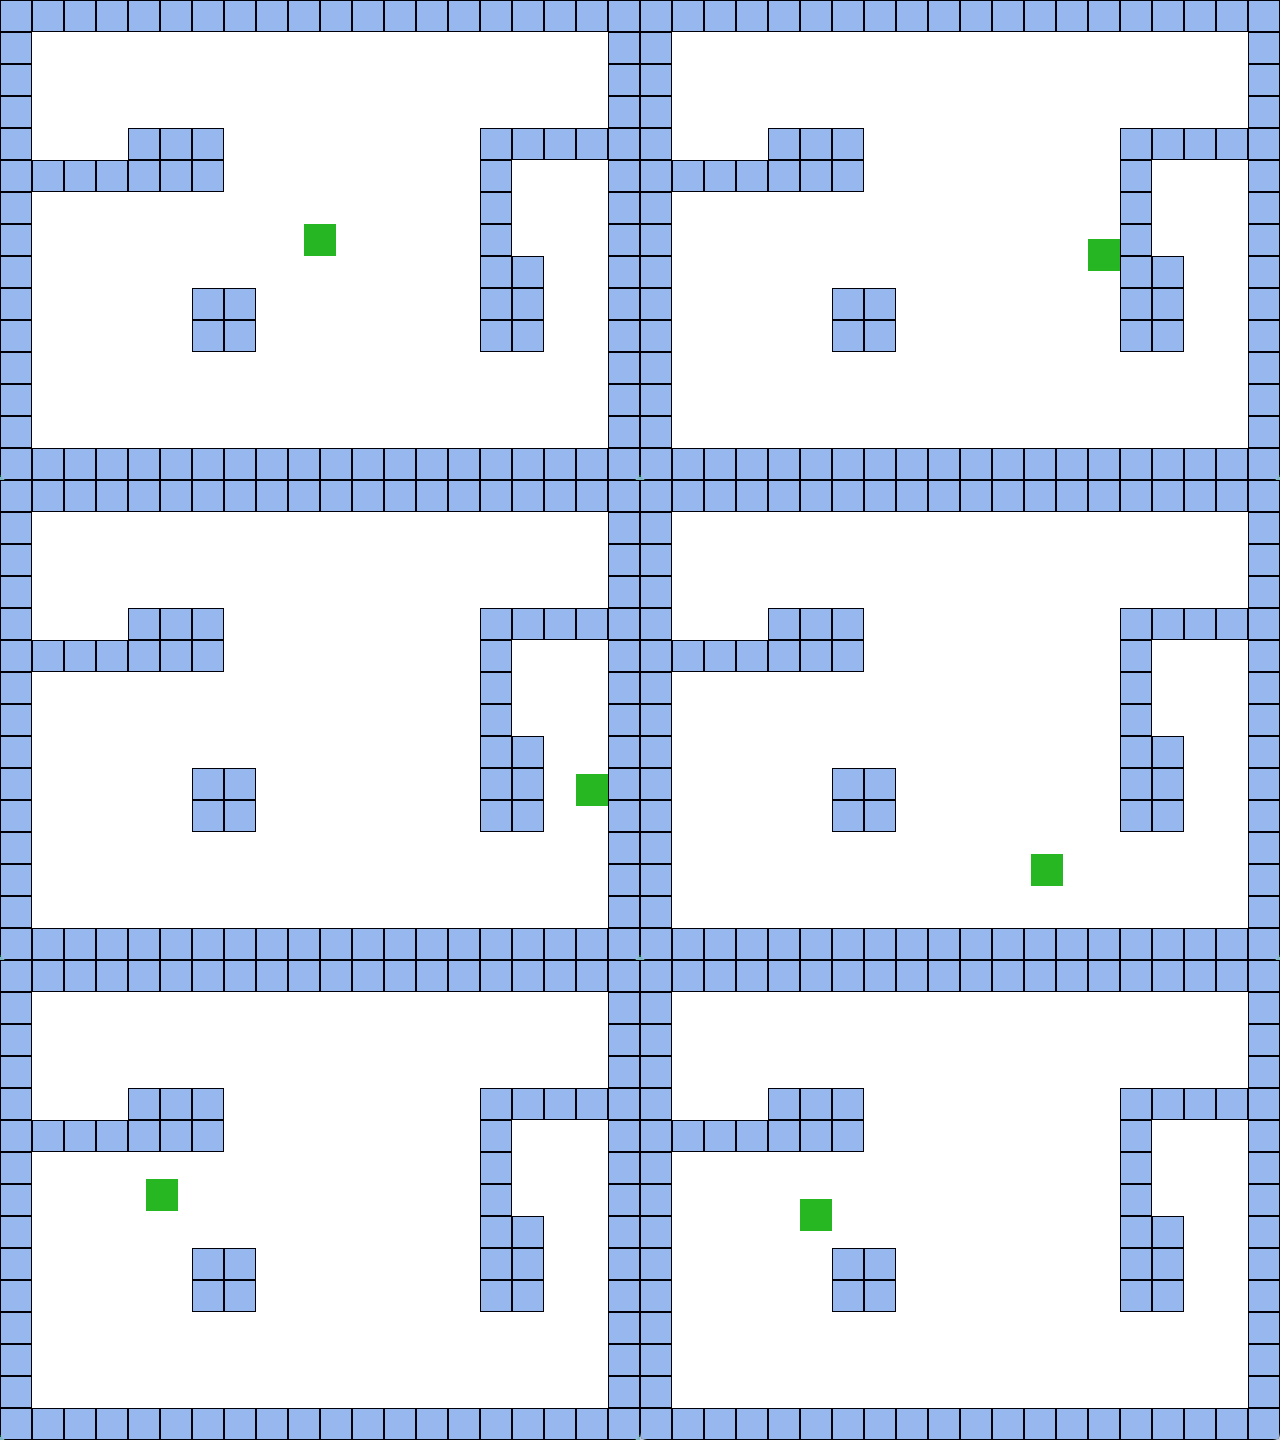
Althorugh this fixes the problem, it isn't ideal to use at all, what if the object moves 24 pixels per frame!? that means the same event dupicated 24 times.. yikes!
That's luckly why Fastloops exist, they can repeat and event a given amount of time before the next frame renders (works exactly as duplicated events)
Loops need to be ran befoe checked, you can run a loop with a given name and given number of times
The name will be used to check for the loop and number of times will be used to repeat the event with, in our case we will run it number of "Spd" times
Here is an example of how to replace the previous events with the fastloop approch:
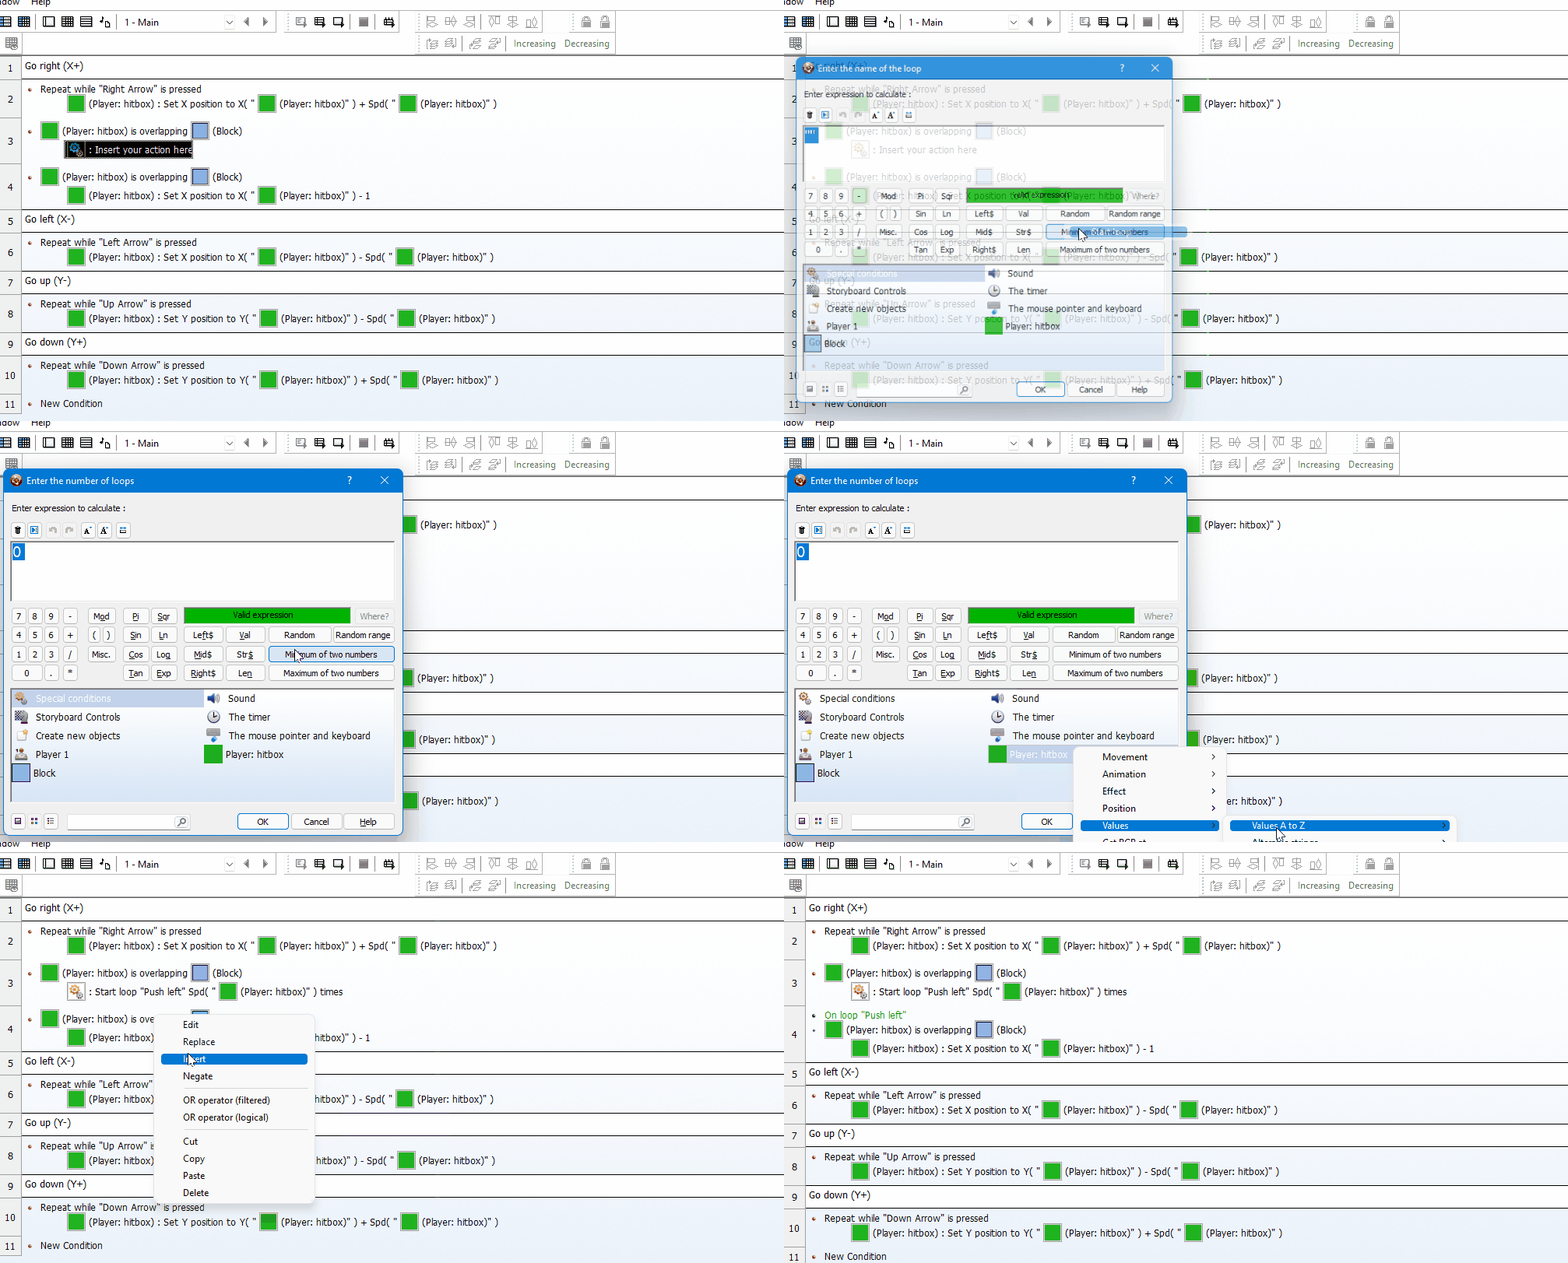
Now repeat the same method for the rest of directions and you should end up with something like this:
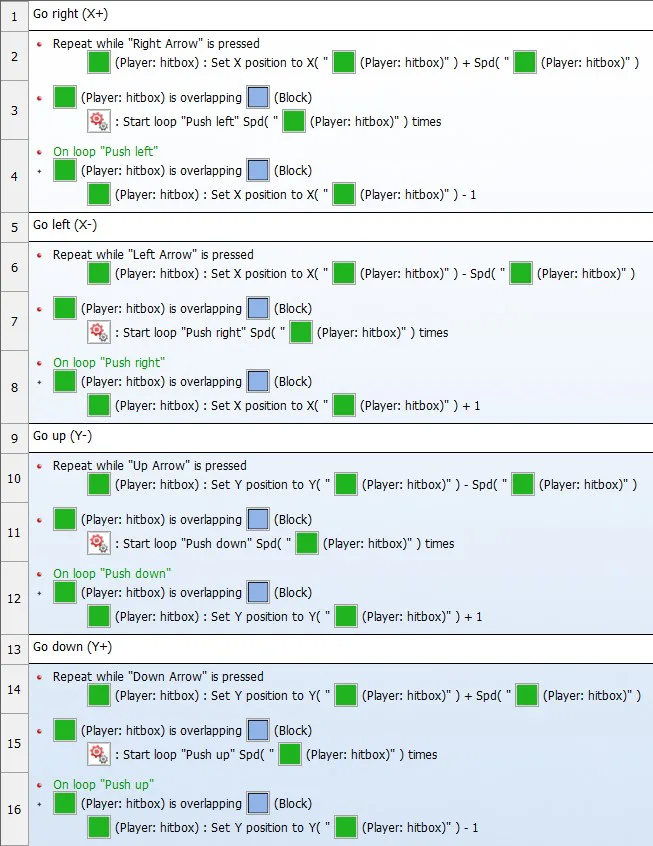
Note: the exact order of these events are really important , the whole procces works with multiple directions is because each push direction is tesed between each input check
If you still didn't fully understand it just know it magically works by the power of event order XD
Anways if all goes fine, you should end up with a complete basic Top-Down movement:
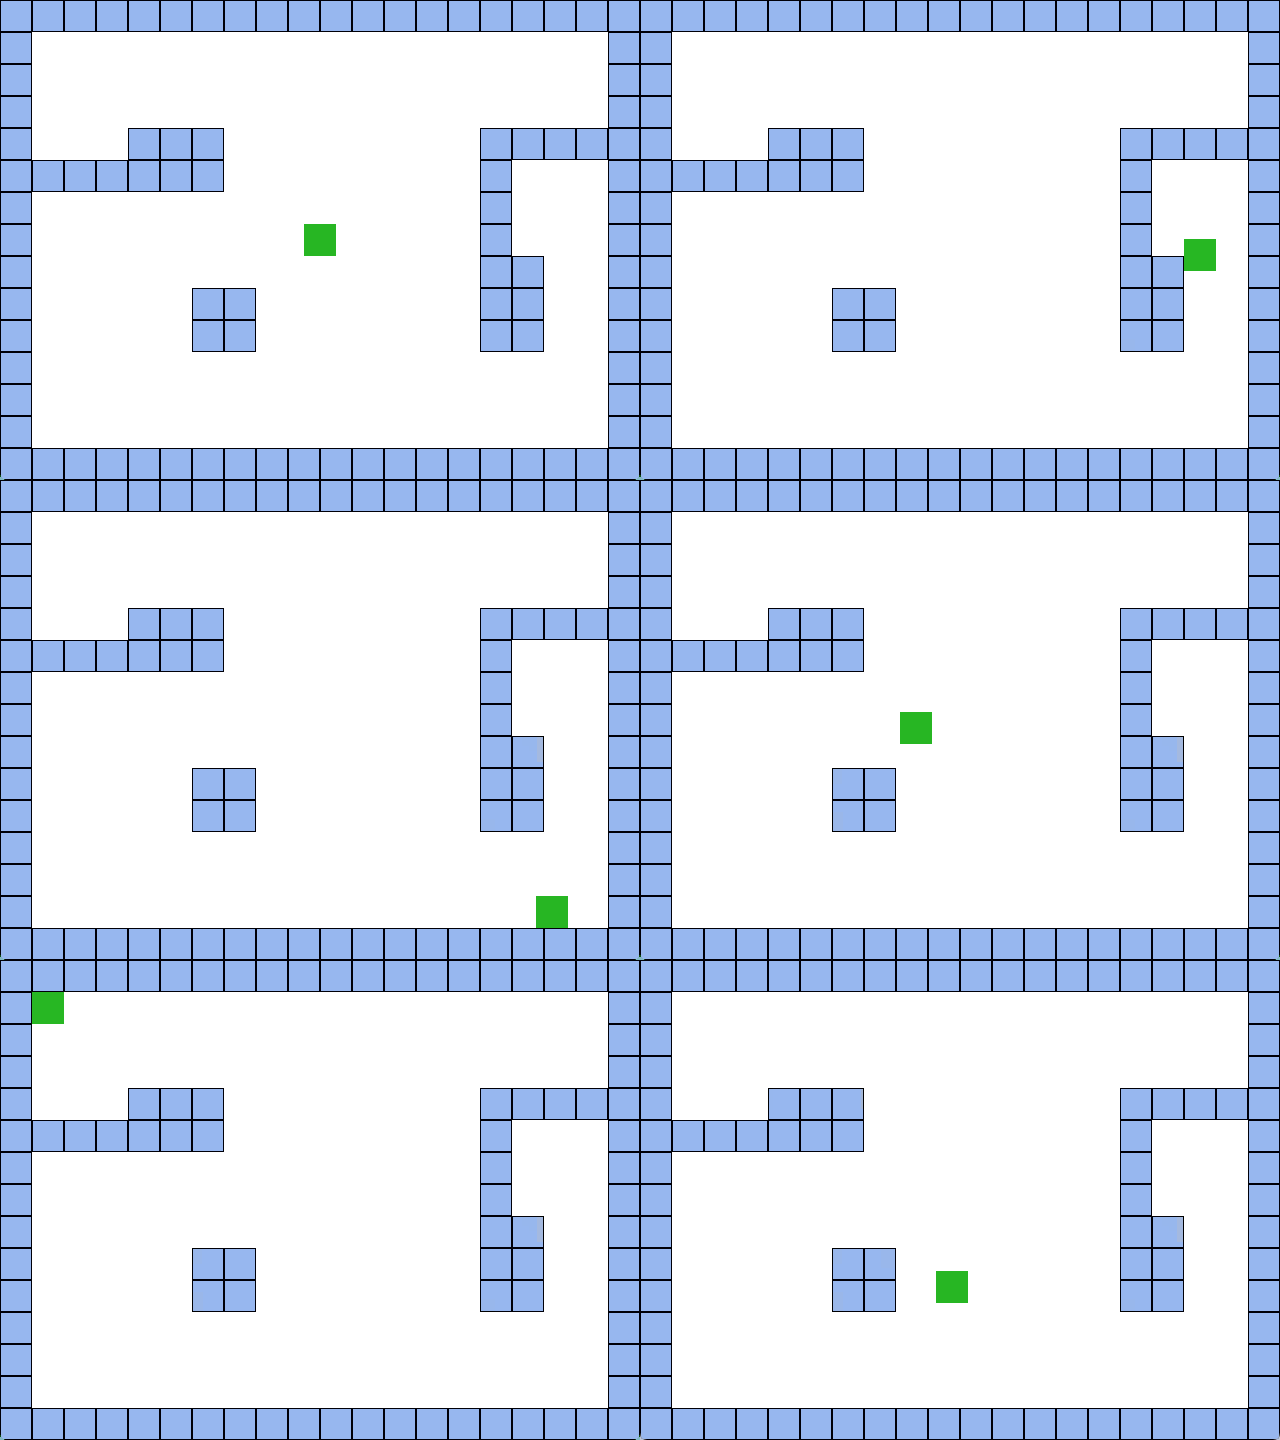
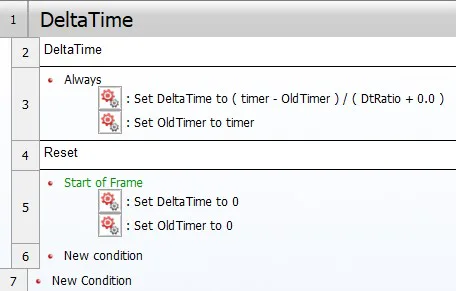
Just know that these are the absolute basics, there are still more flexible ways to the same thing, and ofc there is still acceleration, deaceleration, DeltaTime and slopes all stuff that are optional and will gain knowlege of by practicing a lot
And finally Thanks for reading! hope this was a bit helpful and sorry if it was hard to understand in some aspects. I will try to take suggestions to improve the parts I might have explained poorly
Project mfa: https://drive.google.com/file/d/1uiQvwQW2LBBlbI3nTQZo7jtVV8n5m1Ee/view?usp=sharing





3 comments