
Well, here I am again, providing a tutorial on how to do Mode 7. I think last time, it was a disaster. I didn't post pictures of it in action, and the method was not all there. Besides, it's been buried under a lot of other posts, anyway.
So, rather than beat around the bush, let's start with the code. It's what you really want, isn't it?
Let's start with our Mode 7 Camera. I'm calling it MSevenCam for this example, since Game Maker hates it when you put real numbers in the middle of an object name. You'll want to put it in a room with an enabled view of 320 by 224, since that's what this is designed for. Of course, if you don't want to squint at a tiny window, I recommend putting in window_set_size(640,448) at the Game Start event, which is twice as big and still pixelly.
MSevenCam - Create Event
			///Camera- Create the HDMA stuffs
HDMALine= -1 //Establishes their existence without coding it further
Display = -1

HLine=0 //For HDMA
Scale=0

Shade=c_white

//Mode 7 Sliders
ScaleStart=.25 //Scale at top of the screen
Zoom=1
Pivot=64 //Horizontal line where Scale is always 1
TopLine=0 //vertical position for the Display surface
BottomLine=112 // moves that zoom-in center point for the y axis
VScale=1 // Flattens the background
Angle=90 //which way the camera is pointed
MSevenCam - Draw Event
			///Camera- Draw Object

if surface_exists(HDMALine)=false HDMALine= surface_create(512,2)
if surface_exists(Display)=false Display= surface_create(512,256)

//Mode 7 initialization
Scale=ScaleStart

//Back to regularly scheduled HDMA drawing stuff
HLine=0
surface_set_target(Display)
 draw_clear_alpha(c_black,0)
surface_reset_target()

repeat(224-TopLine){
surface_set_target(HDMALine)
 script_execute(TilePlaneScale)
surface_reset_target()

surface_set_target(Display)
draw_surface_part(HDMALine,0,0,512,1,0,HLine)
surface_reset_target()
HLine+=1
}

draw_surface(Display,view_xview,view_yview+TopLine)

//reset for drawing 3D sprites
Scale=ScaleStart
HLine=0

repeat(256){
 script_execute(MSevenSprScale)
HLine+=1
}
MSevenCam - User-Defined event 15
			///Upon jumping to a totally different room that doesn't use Mode 7, or dying/game-ending
if surface_exists(HDMALine) surface_free(HDMALine)
if surface_exists(Display) surface_free(Display)
MSevenCam - Destroy, Game End, Room End
			///Go to User 15 to kill the textures!
event_perform(ev_other,ev_user15)
There are a few scripts required in the code, but they're tied to some other objects we haven't programmed yet. Create these objects: TilePlane, and MSevenSpr. Make them NOT visible. It's best if you give TilePlane objects a larger depth variable than MSevenSpr. Also, for this bit, add a create event for MSevenSpr that sets Zed = 0 for now. Besides that, don't worry about them.
Now, here's TilePlaneScale script:
			///Mode 7 - TilePlaneScale

draw_clear_alpha(c_black,0)
///The Mode 7 scaling stuff- thanks to Jüdacraz
Slope=(1-ScaleStart)/Pivot
Scale= Zoom*( Slope*(HLine-Pivot)+1)
//y-y0 = Slope(x-x0) /Judacraz's extra bit for some reason

if abs(Scale)<1 Shade=make_color_rgb(abs(Scale)*255,abs(Scale)*255,abs(Scale)*255)
if abs(Scale)>=1 Shade=c_white

with TilePlane {
if other.HLine =0 {
DrawX=(point_distance(0,0,x-other.x,y-other.y)*sin((point_direction(0,0,x-other.x,y-other.y)-other.Angle+90)*pi/180))
DrawY=(point_distance(0,0,x-other.x,y-other.y)*cos((point_direction(0,0,x-other.x,y-other.y)-other.Angle+90)*pi/180))}
//check the collision spot for the plane before drawing
draw_sprite_ext(sprite_index,-1,(160)+((DrawX)*other.Scale),(other.BottomLine)+((DrawY)*other.Scale)-(other.HLine*other.VScale),other.Scale*image_xscale,other.Scale*image_yscale,-other.Angle+image_angle,other.Shade,1)}
...and the MSevenSprScale script:
			///Mode 7 - After Burner 3D sprite-drawing

//The Mode 7 scaling stuff- thanks to Jüdacraz
Slope=(1-ScaleStart)/Pivot
Scale= Zoom*( Slope*(HLine-Pivot)+1)
//y-y0 = Slope(x-x0) /Judacraz's extra bit for some reason

if abs(Scale)<1 Shade=make_color_rgb(abs(Scale)*255,abs(Scale)*255,abs(Scale)*255)
if abs(Scale)>=1 Shade=c_white

with MSevenSpr {
if other.HLine =0 {
DrawX=(point_distance(0,0,x-other.x,y-other.y)*sin((point_direction(0,0,x-other.x,y-other.y)-other.Angle+90)*pi/180))
DrawY=(point_distance(0,0,x-other.x,y-other.y)*cos((point_direction(0,0,x-other.x,y-other.y)-other.Angle+90)*pi/180))
DrewMe=false}
//check the collision spot for the plane before drawing
if DrewMe=false{
if (other.BottomLine)+((DrawY)*other.Scale)-(other.HLine*other.VScale) <= 0{
if other.HLine>0 draw_sprite_ext(sprite_index,-1,(view_xview+160)+((DrawX)*other.Scale),(view_yview+other.HLine+other.TopLine)+(Zed*other.Scale),other.Scale*image_xscale,other.Scale*image_yscale,image_angle,other.Shade,1)
DrewMe=true}}
}
...and that's all you need in terms of scripts. However, you'll probably want a breakdown of what's going on here.
Graphics Recommendations
I'm slipping this here so you don't jump too far ahead. For TilePlane objects, I recommend a 256-by-256 image. It doesn't matter where the origin point goes. For MSevenSpr objects, it doesn't matter what size they are, but I suggest you center the origin to the bottom of the image unless you plan to use the Zed variable.
How Mode 7 Works (more or less)
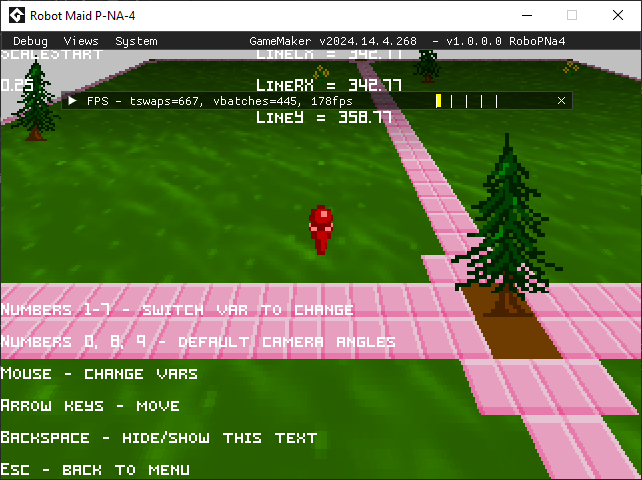
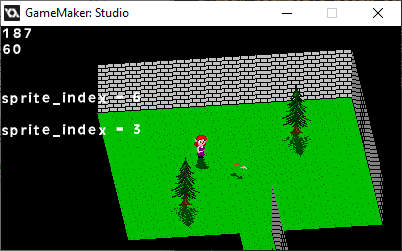
Technically, Mode 7 is just image-scaling and rotation only, but we know that's not what you're after. You're after that 3D-on-a-flat-plane effect. This means using HDMA-styled functions to draw that same scaled-and-rotated image again and again for each and every horizontal line, but at a slightly different size for every scanline. As you can expect, it gets tedious to do this on a machine to draw and redraw a different picture we don't fully see for every scanline, so I've limited it to the 224 vertical lines of the screen resolution I set. (If you're asking why 224 and not 256 like the Display surface, well, surfaces are usually a power of 2 for compatibility reasons, and 224 matches up with the Sega Genesis resolution for my game.)
So, let's reiterate the HDMA functions. HDMALine is a surface representing a scanline. TilePlaneScale draws the TilePlane objects on that surface, then HDMALine's top half gets drawn onto the Display surface at HLine's position. Then the Scale changes for the next scanline as HLine adds up. It does this for as many times as it needs to reach the bottom of the screen to provide the illusion of depth.
That being said, it's tricky for many reasons. Yes, rotating and scaling and image is easy, but adjusting that image for each and every horizontal line can get a bit iffy. It's even more iffy when you need to draw objects on that pseudo-3D field. That's how I discovered seven sliders.
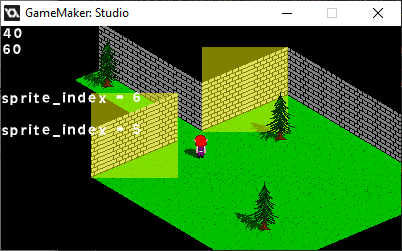
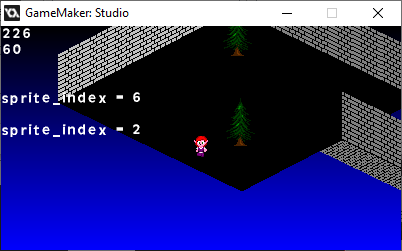
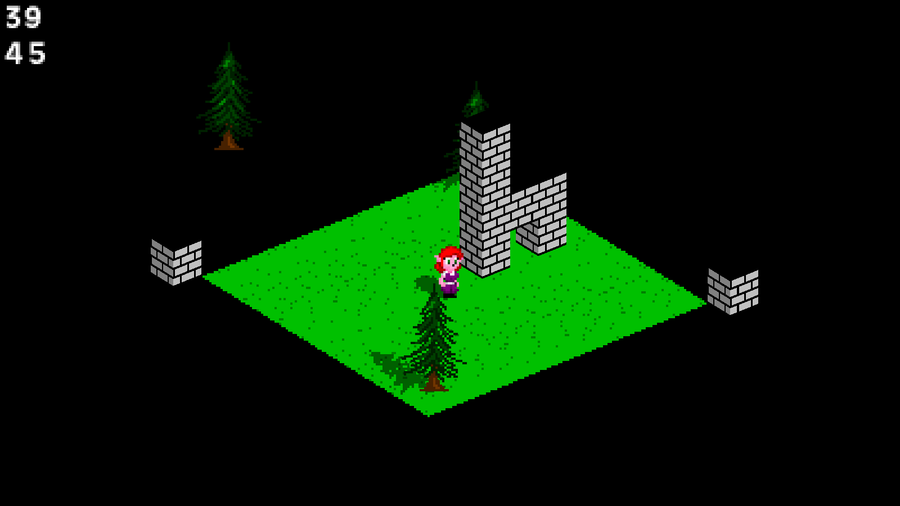
Seven Sliders: What do they do?
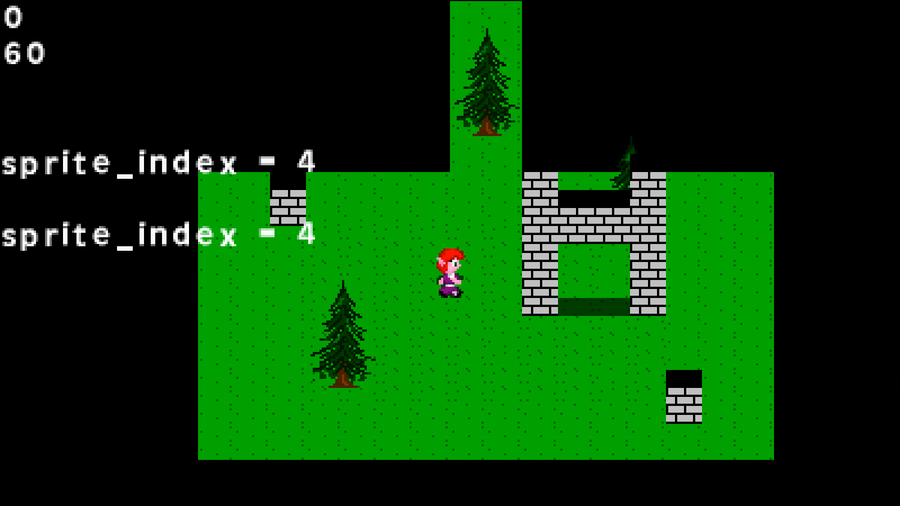
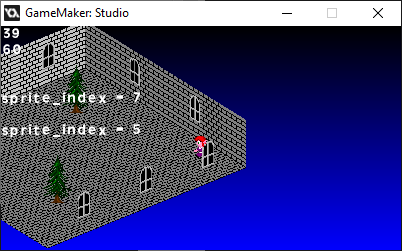
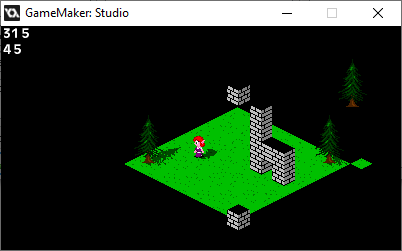
For this, I'm gonna give you pictures. It's easier to see what I'm talking about if you SEE what I'm talking about. These are the Seven Sliders of MSevenCam.


ScaleStart - It's the starting Scale, before any further calculations. If it's 1, it's just as flat as you expect it to be. Make it smaller, and we've got ourselves a slant. If you make it smaller than 0, you might end up seeing parallel worlds.


Zoom - Exactly what it says. It makes things bigger, multiplying Pivot and ScaleStart to it. 1 is your standard size. Make it bigger, and the picture's bigger. Make it smaller, and the picture's smaller.


Pivot - This is the horizontal line where Scale is guaranteed to be equal to Zoom. Obviously, you shouldn't make it 0, but it also could make you see parallel worlds.

TopLine - Literally moves the Mode 7 surface up or down, but preferably down. With the way I coded the rendering with repeat(224-TopLine), it means less instructions to feed when the image is lowered. It makes for a guaranteed horizon line where all pop-in kicks in, no matter how unrealistic it is.


BottomLine - The vertical "vanishing point" for the image-scaling. Mess with this, and you can reduce that Vertigo effect, or cause it.

VScale - This skips scanlines, leading to a vertically flatter image. The bigger the number, the flatter it gets. Goes very well with BottomLine, and can be used to make isometric images.

Angle - Rotates the camera.
Technically, it's nine sliders, if you count the X and Y axes of MSevenCam. With these, you can make any camera perspective you want, from a kart racer to an RPG world map to a rotating battle arena to who-knows-what. Don't be afraid to get creative.
...okay, but HOW do I use it?
That's a good question. Let's start with a test program. For now, make an object called MSevenTestCam. Its parent should be MSevenCam.
Create:
			event_inherited()

//Mode 7 Sliders
ScaleStart=.25 //Scale at top of the screen
Zoom=1
Pivot=64 //Horizontal line where Scale is always 1
TopLine=0 //vertical position for the Display surface
BottomLine=112 // moves that zoom-in center point for the y axis
VScale=1 // Flattens the background
Angle=90 //which way the camera is pointed

Description= "ScaleStart"
Global Mouse Left Button:
			if Description="ScaleStart" ScaleStart=(mouse_y-56)/50 //Scale at top of the screen
if Description="Zoom" Zoom=mouse_y/100
if Description="Pivot" Pivot=mouse_y-TopLine //Horizontal line where Scale is always 1
if Description="TopLine" {TopLine=mouse_y //vertical position for the Display surface
if TopLine<0 TopLine=0
if TopLine>224 TopLine=224}
if Description="BottomLine" BottomLine=mouse_y*2 // moves that zoom-in center point for the y axis
if Description="VScale" VScale=1+(mouse_y/100) // flattens the background by skipping scanlines
if Description="Angle" Angle=-point_direction(160,112,mouse_x,mouse_y) //which way the camera is pointed
Draw:
			event_inherited()

draw_text(view_xview,view_yview,Description)

if Description="ScaleStart" {draw_text(view_xview,view_yview+16,ScaleStart)
if mouse_check_button(mb_left) {
draw_set_color(c_red)
draw_line(view_xview,56,view_xview+view_wview,56)
draw_line(view_xview,106,view_xview+view_wview,106)
draw_set_color(c_white)
draw_line(view_xview,mouse_y,view_xview+view_wview,mouse_y)}
}
if Description="Zoom" {draw_text(view_xview,view_yview+16,Zoom)
if mouse_check_button(mb_left) {
draw_set_color(c_red)
draw_line(view_xview,100,view_xview+view_wview,100)
draw_set_color(c_white)
draw_line(view_xview,mouse_y,view_xview+view_wview,mouse_y)}
}
if Description="Pivot" {draw_text(view_xview,view_yview+16,Pivot)
if mouse_check_button(mb_left) {
draw_set_color(c_red)
draw_line(view_xview,TopLine,view_xview+view_wview,TopLine)
draw_set_color(c_white)
draw_line(view_xview,mouse_y,view_xview+view_wview,mouse_y)}
}
if Description="TopLine" {draw_text(view_xview,view_yview+16,TopLine)
if mouse_check_button(mb_left) {
draw_set_color(c_red)
draw_line(view_xview,TopLine,view_xview+view_wview,TopLine)
draw_set_color(c_white)
draw_line(view_xview,mouse_y,view_xview+view_wview,mouse_y)}
}
if Description="BottomLine" {draw_text(view_xview,view_yview+16,BottomLine)
if mouse_check_button(mb_left) draw_line(view_xview,mouse_y,view_xview+view_wview,mouse_y)}
if Description="VScale" {draw_text(view_xview,view_yview+16,VScale)
if mouse_check_button(mb_left) {
draw_set_color(c_red)
draw_line(view_xview,100,view_xview+view_wview,100)
draw_set_color(c_white)
draw_line(view_xview,mouse_y,view_xview+view_wview,mouse_y)}
}
if Description="Angle" {draw_text(view_xview,view_yview+16,Angle)
if mouse_check_button(mb_left) draw_line(160,112,mouse_x,mouse_y)}
...and for Numbers 1 to 7, set Description to the thing you want to change. With this, the Mouse will change the variable in Description.
If you want, you can also let the arrow keys move around the camera. (Just be aware that if you want to move the camera, the direction should be Angle+90 for forward movement, Angle for moving to its right, etc.)
Again, this is all for testing purposes. I've put in some guidelines to help with this. If you really need an easier way to remember all those numbers, or code a way for the camera to move automatically, you can make your own programs for that. I know I have.
Now, if you want a code breakdown for all the other details, let me know. I've been pursuing this white whale of code for years, and I don't want to get too bogged down about it.


0 comments