Sprite cloning is a very useful tool that allows you to make copies of a sprite, especially to platformer games. So, I'll give you some tips.
How can I manage each clone to have their own code?
To do this, it requires an in-sprite-only variable. I would recommend calling it "Clones". This allows each clone to check to see what kind of clone it is. You can make a custom block and set it up like this:
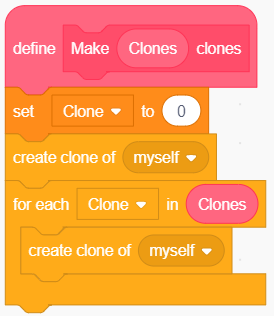
If you don't know what the bottom one is (That says "for each cone in clones"), it's basically a repeat loop that you can select a variable and then set the number input. When it runs, and when the coding inside that block finished, it repeats and changes the variable by 1. It's basically like the simple repeat block, but also changes the variable number by 1.
And then, you can set up the clones like this:
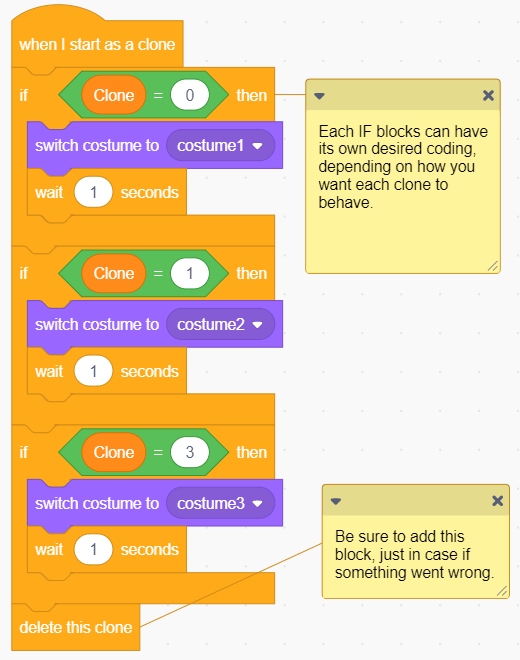
This is a useful method, especially to platformer games.
Concerning about messages being broadcasted and the clones take affect from it...
I bet some of you may be wondering, "Why does the clones take affect from broadcasted messages?" Well, that is how clones work. All clones are the same as the primary sprite and they copy literally everything, the variables, the costumes, the sounds, and even all of the coding. You see, according the Scratch Wiki, a clone is a carbon copy of a sprite, but it is otherwise independent. However, there is one way to fix that.
How can I prevent the clones from taking action from broadcasted messages?
To do this, you need another variable. Just name it "Clone?" with a question mark at the end. Then you need to add an IF block at the clone coding and it should look like this:
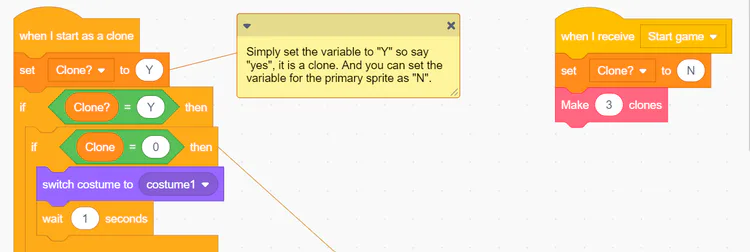
And when another message was received, the clones will not run it, and only the primary sprite can.
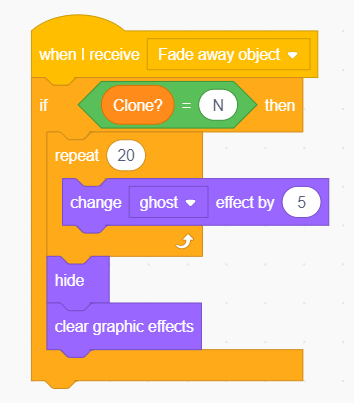
And there you go, problem solved. 
If you have any questions, feel free to bump your comments.
I cannot guarantee that I can answer every single thing you asked. Yet, I'm not a 100% expert.







14 comments