==============Tactical Controller Addon============
Article Sections in Order are:
-Download Links
-Install Guide
-Default Keybinds
-Customisation Guide
=================Download Links================
- Shockwave 2 Source Code Build
- Shockwave 2 Hidden Build (Coming Soon)
==================Install Guide==================
• If you want to add the Tactical Controller to your own project, or to a newer build of Shockwave 2, follow this guide to port the controller over.
• 1) Open the TCA project and export the "TCA Controller" sprite to your computer.
• 2) Upload the TCA Controller to your project.
• 3) Open the Sounds tab, drag and drop all of the sound files from the TCA Controller to the "Player" sprite.
• 4) Move to the Code tab, every block inside the TAC Controller sprite is attached to a comment indicating where they should go. Read them while following along this tutorial.
• 5) Move the "Tactical Controller" Custom Block to the "Player" sprite.
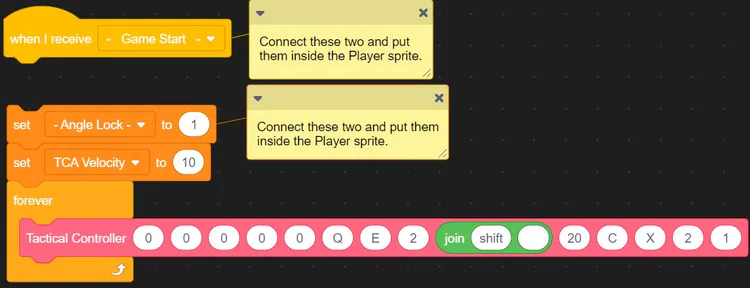
• 6) Find the code thats shown under here inside the "TAC Controller" sprite, connect them and move it to the "Player" sprite.
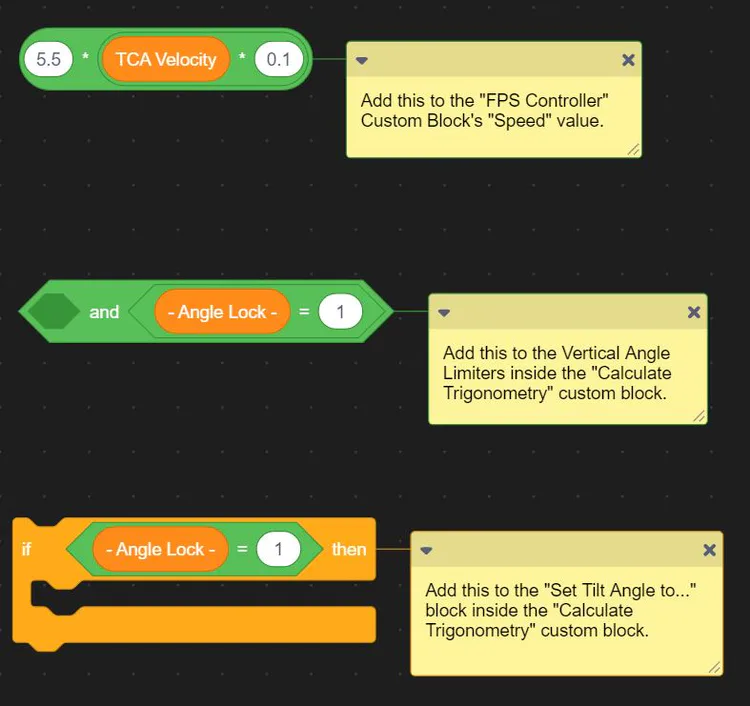
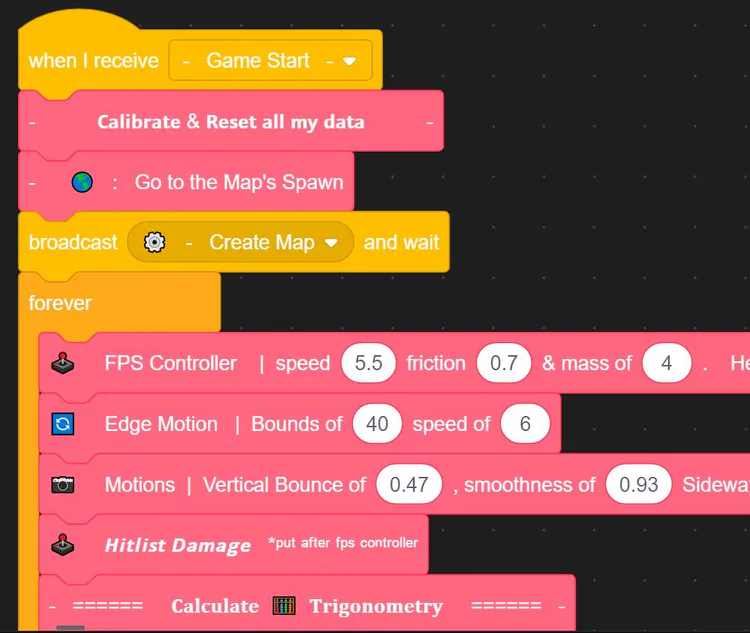
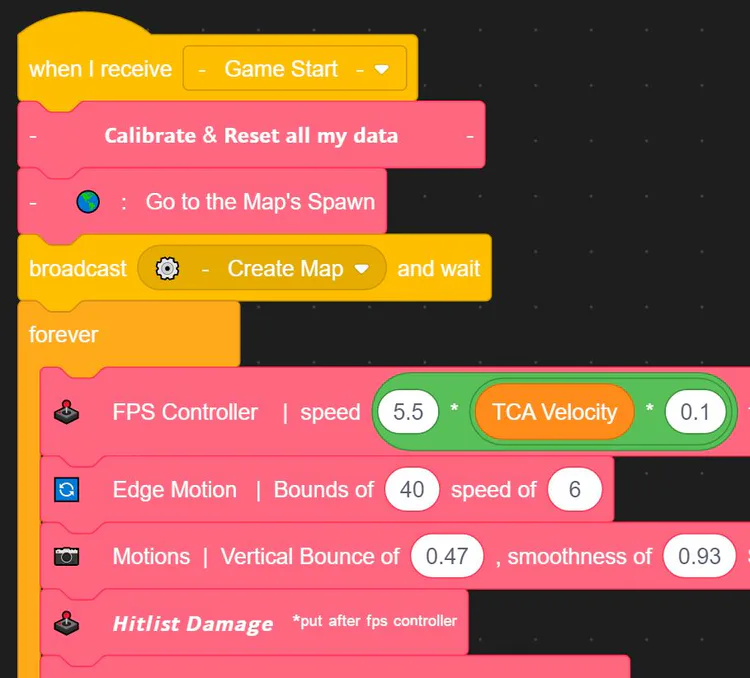
• 7) Find these three blocks inside "TAC Controller" sprite and move them to the "Player" sprite. Replace and/or add them to the places written in the comments. Keep in mind that the "5.5" value in the first block is the default walk speed of Shockwave 2. If you were using a different value, dont forget to change the "5.5" value here as well.
BEFORE:
AFTER
BEFORE
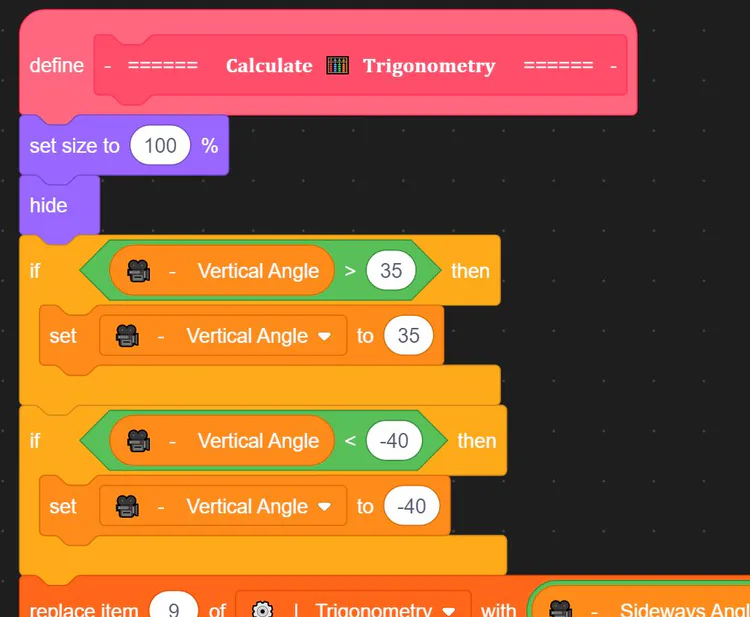
AFTER
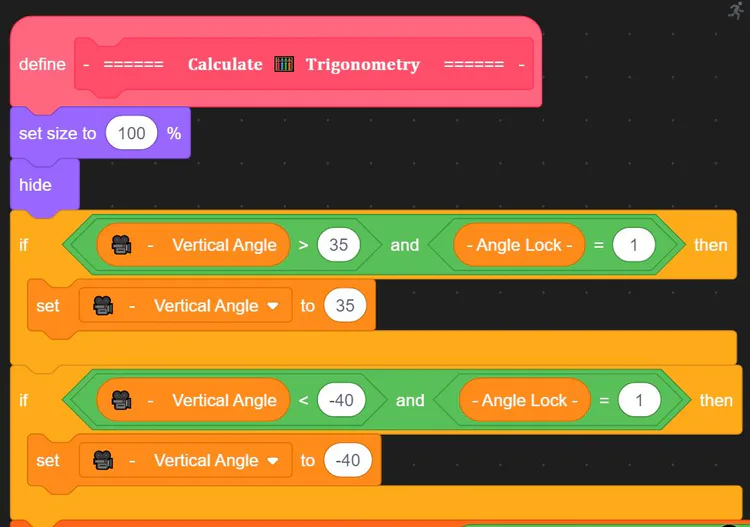
BEFORE
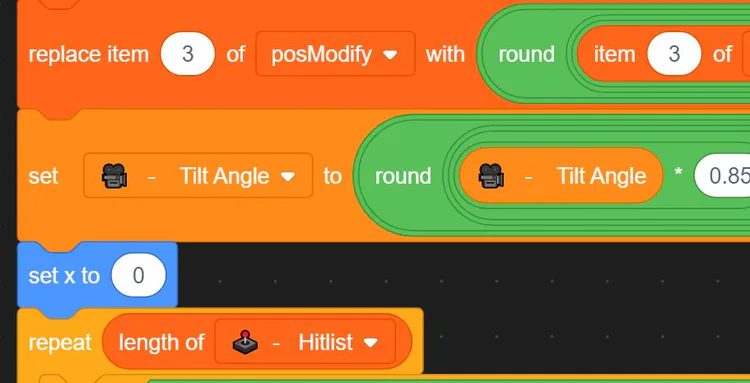
AFTER
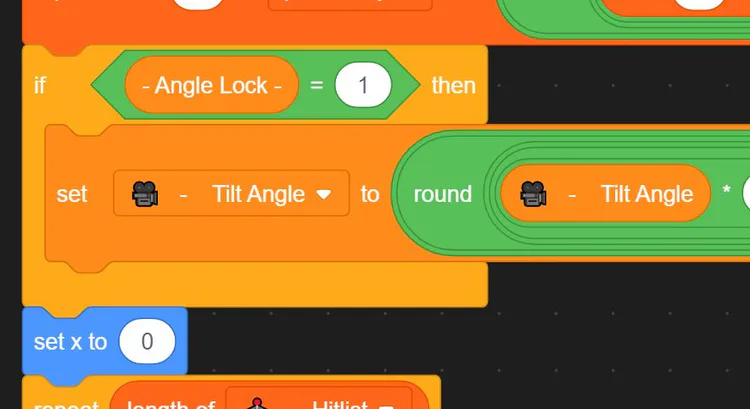
• 8) Go into the "Player" sprite and find the line of code you just edited in the first Before/After picture. Replace the Shift-Crouch to C-Crouch as seen in the screenshots below.
BEFORE
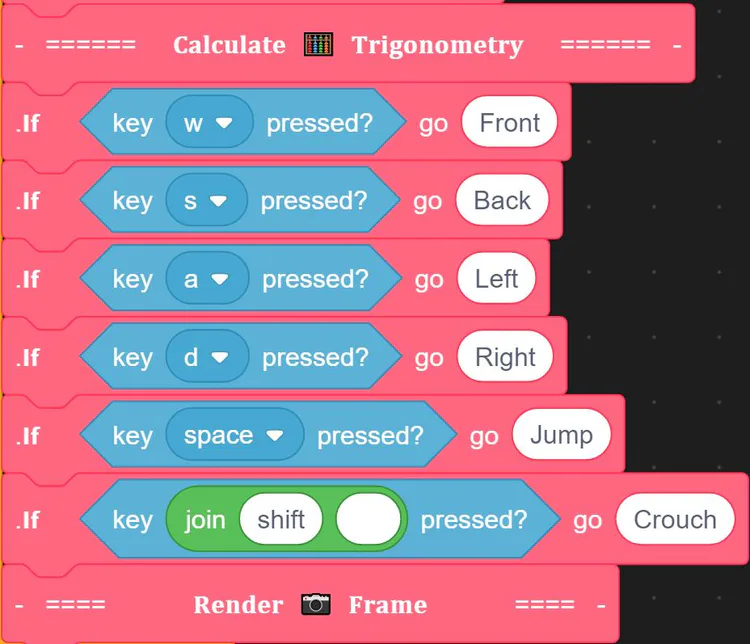
AFTER
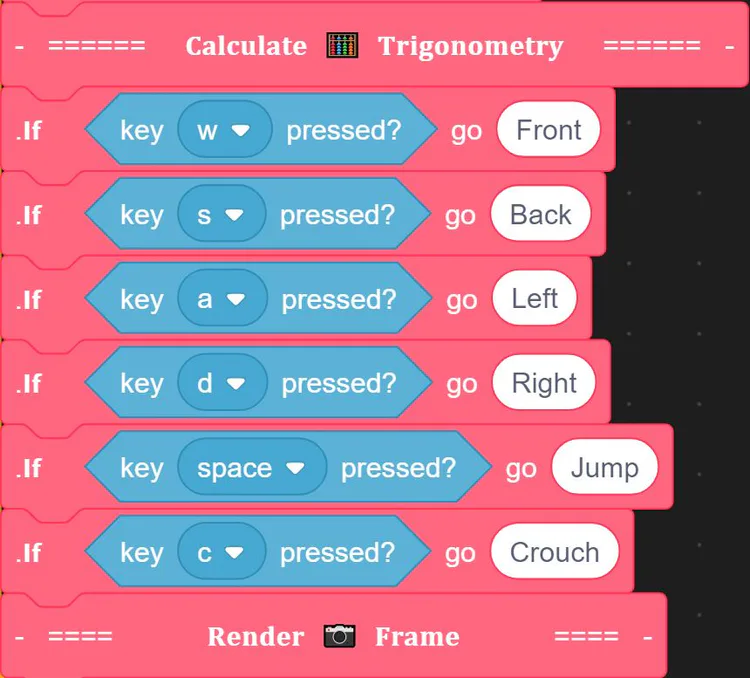
=================Default Keybinds===============
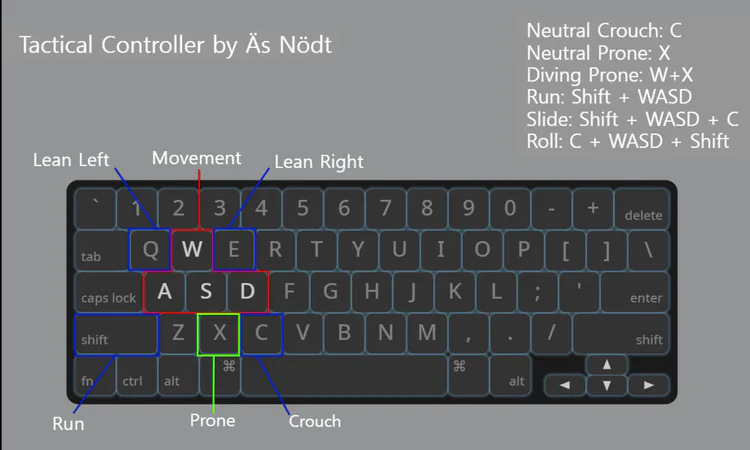
===============Customisation Guide==============
The TCA allows you to modify everything with relative ease. You can modify or completely remove individual features or change their input mechanics by modifying the custom block values and some of the custom block itself. Read through this gude if you wish to do that.
In the "TCA Controller" sprite you will find a Tactical Controller custom block trigger that is filled with the names of each value next to two comments. Read through the comments there or right under here.

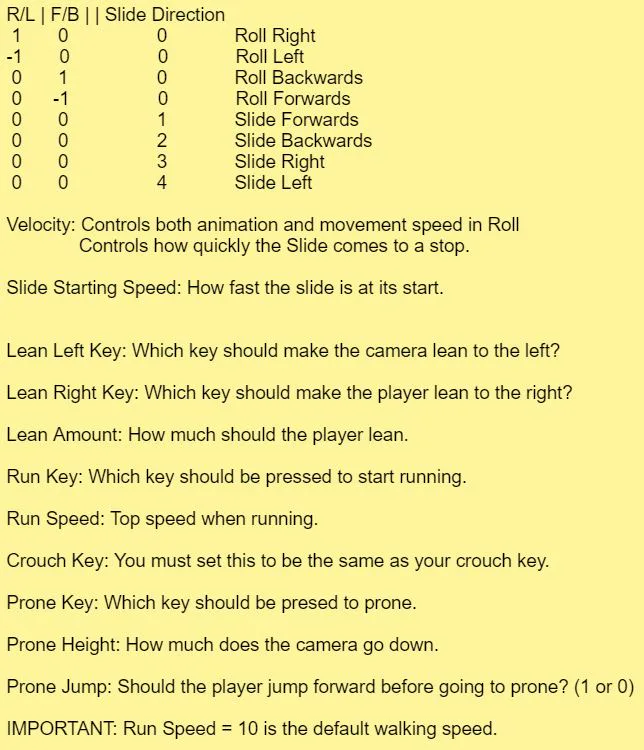
This is the documentation of what each variable of the custom block does. You can edit these values to your liking.
Please note that activating more than two actions in the same custom block (Such as both left and right rolls, or a roll and a slide) could cause a bug.
Section 1: Roll
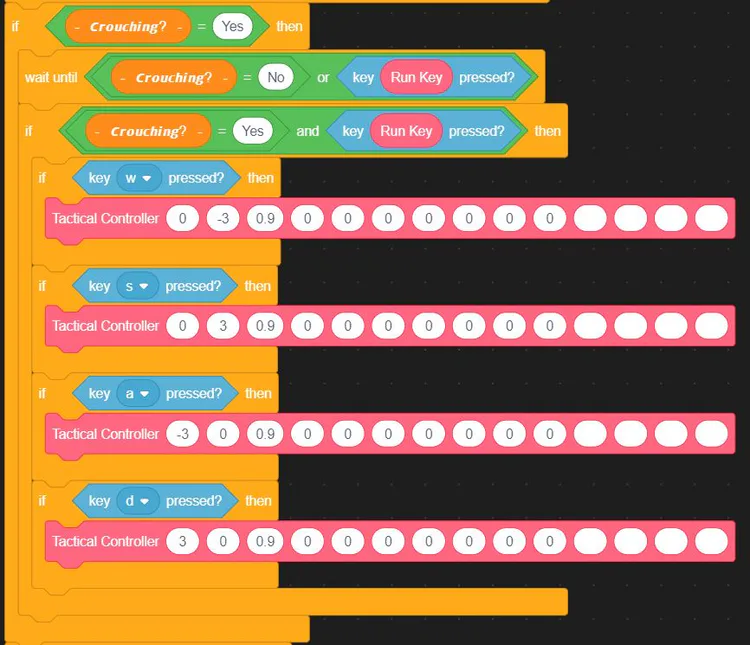
•Editing the L/R and F/B values will change the roll animation speed without effecting how far the player moves. For example an L/R value of 1 will slowly roll the player to the right. an L/R value of 5 will also roll the player right and travel the same distance but with a faster animation. Making the L/R value negative will change the roll direction, for example an L/R value of -1 will roll to the left with the same animation speed of an L/R 1 roll to the right.
•Increasing the Velocity value for a roll action will increase both the range of the roll and the animation speed.
•Default trigger for a roll action is tapping Shift while holding C and a direction key. The roll values and the input keys can be edited for the roll action as well as removed by finding this line of code inside the Tactical Controller custom block.
Section 2: Crouching
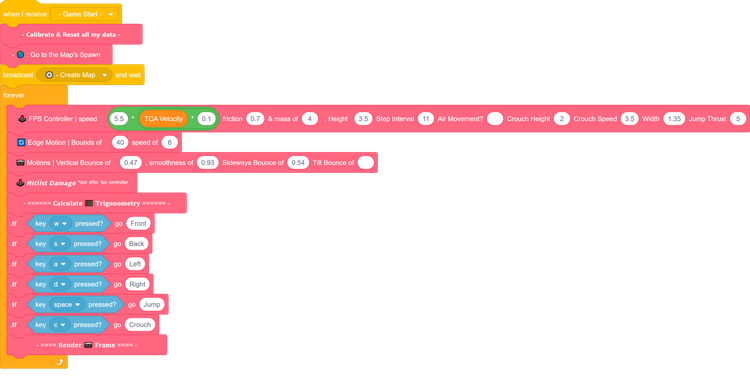
•Crouching is a default feature of Shockwave 2 so if you wish to remove it or change its keybinds you must find these two blocks inside the Player sprite and change them. Keep in mind that if you remove the Crouch feature from Shockwave 2, you will have to make custom inputs for Sliding and Rolling.

Section 3: Running and Sliding
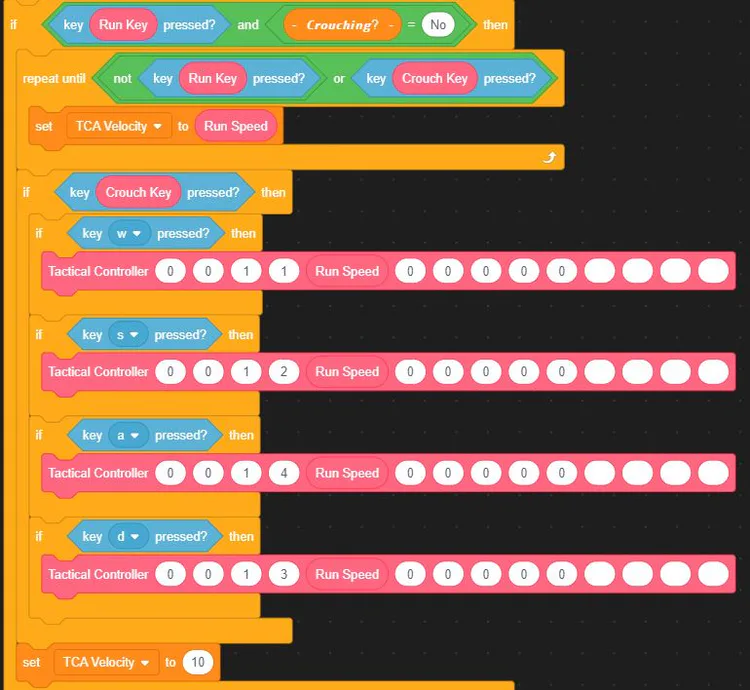
•Editing run values and the run keybind is as simple as just changing them on this custom block here. Refer to the Custom Block documentation at the beginning of the Customisation Guide for help.

•Default trigger for a Slide is tied to Running and Crouching. You can change or remove them to your liking here, in the TCA Custom Block. Once again refer to the Custom Block documentation at the beginning of the Customisation Guide for help.
Section 4: Tilting
•Default Tilt triggers are Q and E and alongisde the tilt amount they can be edited in the main controller just like running.

Section 4: Prone and Diving Prone
•Default prone trigger and key X are also found in the main controller along with how much the camera moves down. If you wish to disable the "Diving Prone" mechanic, change the last variable of the custom block from a "1" to "0"










5 comments