Prologue:
Now for real, if you're thinking about downloading GameMaker Studio, go ahead it's free all the way until you need to export your game (Which is far off). So go ahead and try it, you'll learn tons of valuable aspects to game design, engine design (Since other game engines like Unity and Godot bare some resemblance to each other), and programming (In my opinion, GML [GameMaker's built in programming language] is one of the simplest languages you can start off with and has syntax very close to Javascript). So if you're thinking about starting a game, give this engine a try.
Also, this guide goes over the basics of programming in GML, so if you don't care about the IDE stuff, skip down to the fifth chapter; the "Scripting" section.
Introduction:
Now I assume you have downloaded GameMaker, let's start off with what I'm gonna call the "Project Page".
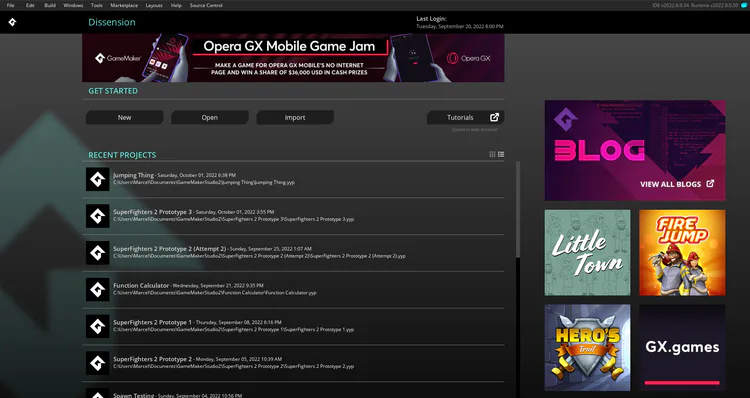
(While this page has the file and other options at the top, I'm not gonna talk about it at the moment). At the project page, you create a project from scratch, or go into one of GameMaker's "Tutorial" projects built-in for you (This post is only gonna go over the from scratch projects).
Chapter 1/5 Simple Questions And Terms:
Questions:
What is the difference between Objects and Sprites?
A sprite is simply a picture or an animation. It is how an object looks like. An object is the logic of something. I can have an object that changes sprites when I press spacebar for instance.
What is the difference between Objects and Instances?
Objects speak for all instances of that object. If I have Object Player and I put 2 of those objects down in a room, if I mess with Object Player, it affects both of them. But if I mess with the second instance the Object Player, it'll only affect that one.
Terms:
Viewport:
Viewports allow for scrolling screens and is basically what the camera actually sees in a room. A room can (And usually is and should) be bigger than the viewport. If you have a game where the player always sees the entire room size, then you don't need a viewport.
IDE:
IDE, or Integrated Developer Environment is what a developer uses to make something.
Script/Function:
A script or a function is a slice of code that can be ran over and over again without writing it a second time (I'll explain in more detail in the scripting section.
Events:
Events are GameMaker's way of knowing when to run specific pieces of your code. For instance, the "Create" event runs only once when that object is created, making it great for setting variables, while something like the "Step" event runs once every frame and is probably where you're gonna put most of your code for that object.
Chapter 2/5 The IDE:
GameMaker's IDE is full of editors and conveniences for you to use, but with everything blasting you in the face at once, it can seem a little complicated at first. Let's start off with "The Main Workspace".
The Main Workspace:
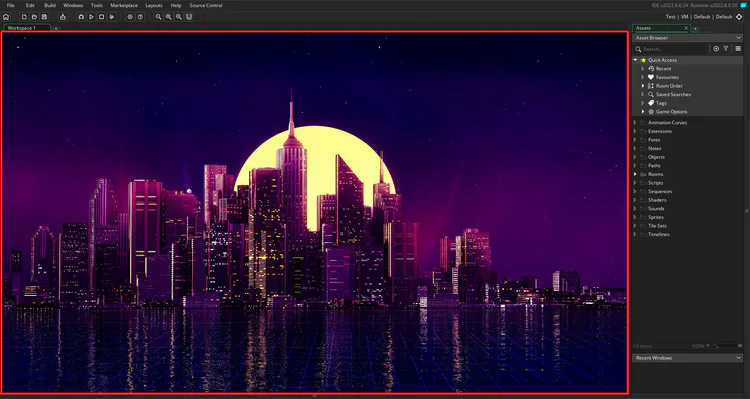
The main workspace (The area inside the red outline) is where you'll do most of your work whether that'll be programming, sounds, or sprites, chances are you'll probably be doing it here. (Note: You can change the background of the main workspace as I have done here in preferences which I'll go over later)
The Assets (Or Hierarchy In Unity):
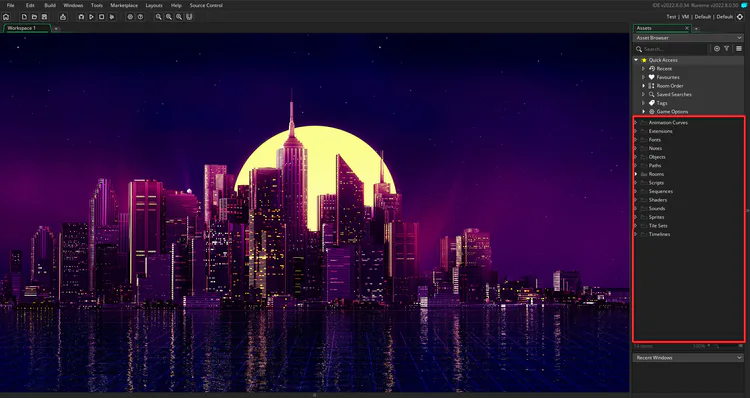
This area is where you'll access most of your assets, consisting of objects, sprites, sound, scripts, and more. To create something, go over to one of the folders, right-click, hover over create, and choose what asset you would like to make. (Note: You can rename, color, and create these folders [Called "Groups" in GameMaker] and you can stack them [I.E. Having a folder inside a folder]. Also you can place different type assets in folders [Putting a object asset in the sprite folder] even though it is not advised since organization is a huge issue most people face when making a game).
The Work Buttons:
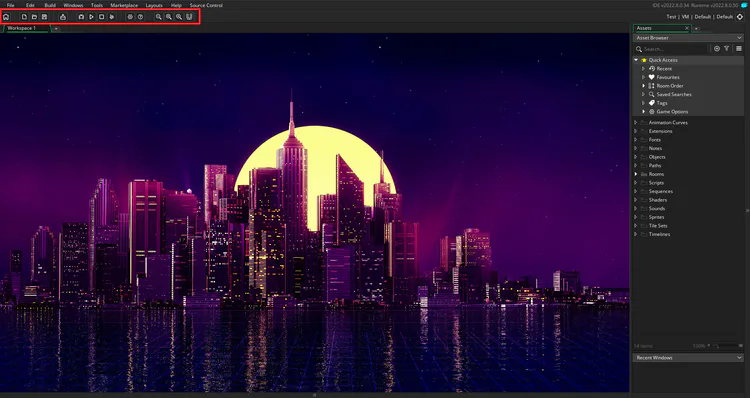
These work buttons are separated into columns, let's go over each one by one.
Home Column:
This button just lets you exit the project and go back to the project page, pretty simple.
Project Column:
The next column is basically a makeshift version of the project page inside the IDE. You can create a new project, open an already existing project, or save the current one. Also pretty simple.
Play Column:
This column let's you play your game to see what you have made.
The first button, the debugger is a HEAVILY useful tool which I'll go over in detail after I finish the IDE section.
The second button is the play button, pretty self-explanatory.
The third button is the stop button, it closes your game. Useful for when your game freezes up, because when your game freezes, the "X" button on the window doesn't work.
Finally, the fourth button is the clean button. This simple makes your game run from complete scratch again. I don't see myself using this button very much though.
Settings Column:
This column consists of 2 very useful buttons, the game settings and the GameMaker Manual.
The game settings button, or game options, allows you to change some basic settings for the current and for future projects like the scripting language (GML or Visual) and FPS. It also has exporting sections.
The help button opens up the GameMaker Manual in your default browser. This manual is also very essential, especially if you've never programmed before. It teaches you about the IDE and such, but you'll find that you use it mostly for programming purposes.
Docking Column:
Okay, the last column here is about how big (Or small) you want your main workspace to be and also what information you want to show at any given time.
The -, =, and + buttons either zooms out, goes back to the default zoom, or zooms in respectively.
The "Docking" button opens/closes all the "Docks" you have available. A dock is just something on the side containing information and can be opened and closed, like the assets area.
The File Buttons:
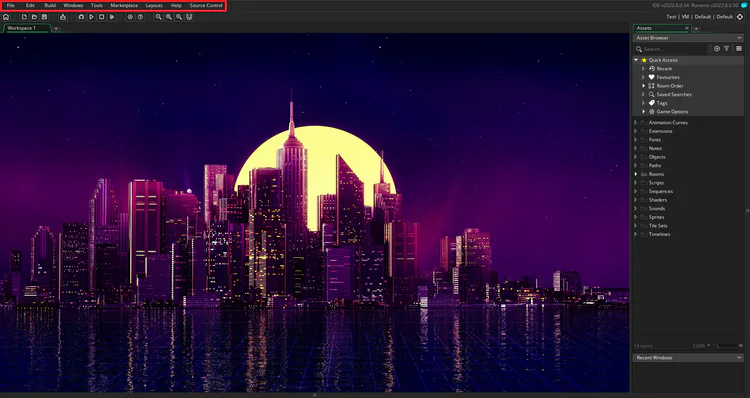
I ain't gonna go over all of these so I'm gonna do this real quick.
File:
Where you can do stuff from the project page like create or load a project, go to preferences, or even open a second IDE if you have dual monitors.
Marketplace:
Allows you to find tons of things for projects, including scripts, sprites, ETC.
Layout:
Since you control the size of the docks and what docs are opened and such, you can save that "Layout" and have that saved for later use.
The rest of the buttons are either secondary ways of doing things previously mentioned, or are self-explanatory.
Chapter 3/5 The Debugger:
The Debugger is very useful for 3 reasons, it allows you to see the performance of your game, check for bugs in your code line by line, and view the instances in the current room and what variables they hold.
Performance:
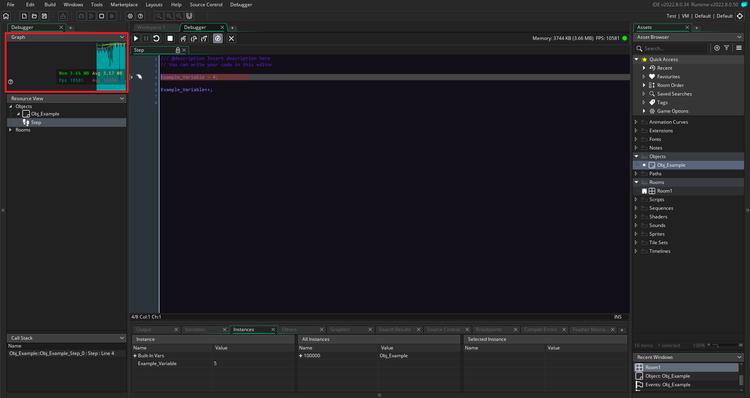
Performance in the top-left gives you information about how fast your game is running and how much space it is taking. I wouldn't focus too much on this though at the beginning because you should only focus on optimizations after you got your core features done plus your game is going to run really fast at the beginning when there isn't a lot to process.
Resources:
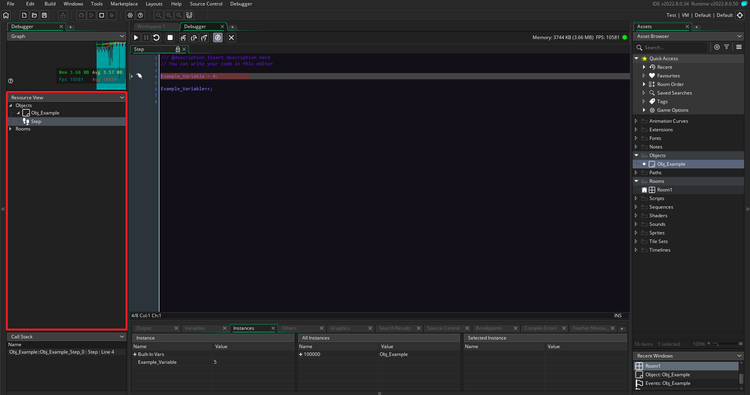
This simply shows you what objects and rooms you have alongside the code you have in each object.
Code View:
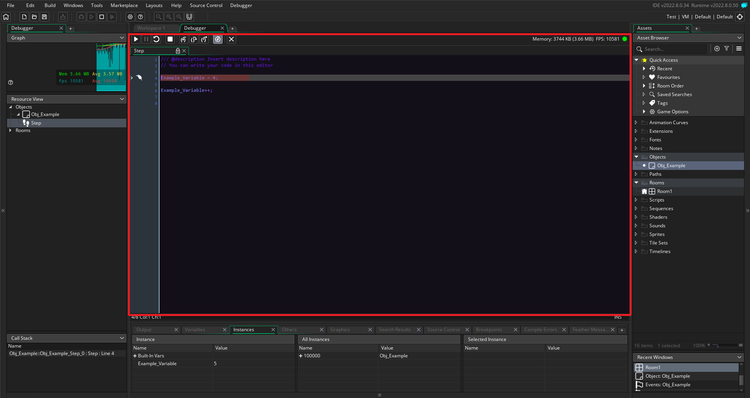
This by far is the best feature of the Debugger, maybe in the history of debuggers. This shows you what line the game is on, not only that, but it allows you to go through sections of your code one at a time. To get here press the pause button after you pressed the debugger button, it should pause your game and show what line of code the game is on. Then you can use the 3 buttons with the arrows and braces to move around in your code (I recommended using the first one for most purposes because it goes line by line, while the other one's skip over sections, which is still useful, just not as practical in most scenarios).
Instance View:
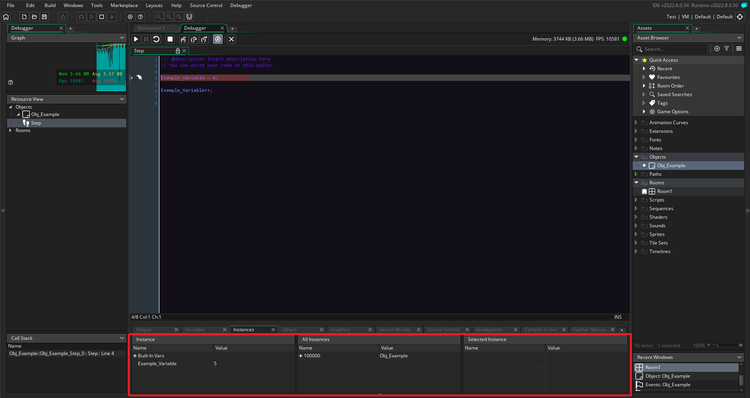
This shows what instances are in the current room and by pressing the "+" button on the side, it will show the variables the specific instance has and what values those variables hold. Useful for when you think a variable value is different from what you expect it to be.
Chapter 4/5 Rooms (Or Scenes In Unity):
With the IDE and the Debugger out of the way, let's quickly go over the room system.
A room is simply a level, or more broadly, an area that the game can be in at a given time. For instance, level 1 could be a room, and level 2 would be a different room, and if you beat level 1, go to level 2. A room also is where you can drag instances (Or copies of an object) into, so you can see it in your game.
However, you don't see the entirety of level 1 spawn in, this is using viewports which can be changed in many ways with code, but that is beyond the scope of this huge post.
There are also room settings in a dock on the left (Should automatically open when you go to a room tab). This allows you to do some simple stuff like add viewports, or change the background of that room. You can also add room creation code that will run only once when that room is loaded in.
Chapter 5/5 Scripting:
The final chapter, the coding. I'm gonna go over the basics of coding/programming here, so if you came for that, cool. But if you came here only for seeing GameMaker's engine layout and nothing else, don't bother reading the rest of this post.
Events:
Like mentioned in the "Questions And Terms" chapter, events are pieces of your code that only run when the event says so. I'm only gonna cover the create and step events since the other one's are either highly situational or has other ways to do the same thing (I.E. Place_meeting and the Collision event).
Basics Of Programming:
This will cover everything that just about every programming language (Including GML) has, so it'll help you code in GameMaker and it'll also help you pick up future languages down the line.
Variables:
Variables are simple something that holds a value that can change and when called, brings back that value. A variable can have many different types of values including strings ("String"), a number (4), arrays ([1, 2, 3, 4]), and more. A variable is used in 2 steps: declaration and calling (Or referring, doesn't really matter how you call it). To declare a variable in GML, you don't have to worry about the type of variable you want until you set it's value, example of variables would be:
A = 4;
B = "This is a string.";
C = [1, 2, 3, 4];
D = [[1, 2], [3, 4], [5, 6]];
And then you use those values for anything, you can also make a way for those variables to change when certain actions are done. Now with variables simply covered, let's go over keywords.
Keywords:
Keywords are words built-in a programming language to mean something, most of the time it decides when and how pieces of your code are run. I'm gonna list a couple that GML has and give a concise definition of each:
If:
Checks if the given expression is true, if it is run the code given inside the if statement, if it is not true, skip over it.
If(A > 4)
{
B = 4;
}
Else if:
Goes under an if statement, if that if statement was false and the given expression is true, run this code instead. However if the if statement was true, skip the else if statement. (Note: You can stack multiple else if's on top of each other).
If(A > 4)
{
B = 4;
}
Else if(A < 10)
{
B = 5;
}
Else:
Goes under else if or regular if statements and works the same way except it doesn't check if anything is true, as long as the if/else if's above it was false, it will run.
if(A > 4)
{
B = 4;
}
Else
{
B = 7;
}
Switch:
S
Repeat:
A looping keyword that simply just repeats the code you put in it the amount of times you specify.
Repeat(A)
{
B = B + 1;
}
While:
Another looping keyword, this, like an if statement, checks if something is true, but unlike an if statement, it will keep on looping that code over and over until it doesn't equal true. (Note: Always make sure to have a way out of a while loop because you can get stuck running that code forever).
While(A > 4)
{
A = A - 1;
}
For:
Loops the code you write in it like the repeat keyword, but also creates a variable to use inside that code that changes every time it's run. This one's a little more complicated so let's break it down.
For(i = 0; i < 4; i++)
That sets a new variable "I" to be 0, then it checks if i is less than 4 like an if statement. If it is, run the code given underneath, then once you're done running that code do "I++" which adds 1 to i.
This is very useful if you're working with arrays, you could do something like A[i] to create a bunch of array variables. You could also make your for loop code run a little differently each time it loops because of the changing i variable. (Note: The variable doesn't have to be i, it just usually is. And the ++ at the end doesn't have to be that either, it can be -- (Subtract 1) or any other operation).
Conclusion:
Well that's about it. Hopefully this can serve as a starting point for someone or at least inspire them to think about doing GameDev. While I am no where NEAR an expert (Not even average  ) I think this is basic enough that anyone can get.
Not sure what else to say. But until my next post (which will probably be about my Palette Changer I had made [Using GameMaker!]), adieu










0 comments