
This was originally meant to be hosted on Proton Docs, however, unfortunately GIFs are static there, and therefore it has to be moved here. Please forgive crappy table screenshots. Thank you.
With that aside, this is going to start off as a mere introductory guide, however will have genuine strategies added with gameplay once I get my motivation together. In short, if you're looking for an introduction to FFA, you might be at a somewhat decent place, but if you're already an avid player, this place isn't worthy for you (yet) until "INTRODUCTION OUT" is removed, as this is merely introductory things and not tricks.
[SECTION ONE]
\\\ introduction ///
TABLE OF CONTENTS
BASICS
Prologue - What's an FFA, anyway?
Part 1 - Controls & Basic Mechanics
(Part 1 - Basic Mechanics)
Part 2 - Perks & Usage
Part 3 - Basic Strategies - Player Interaction
PROLOGUE - WHAT'S AN FFA, ANYWAY?
Free For All is a neat little gamemode that has an achievement for reaching POWER 10 (this mode's version of RANK, put simply, more on that later), and a daily quest to confirm a set amount of kills (sorry about the weird wording - I'll get into this in a bit!).
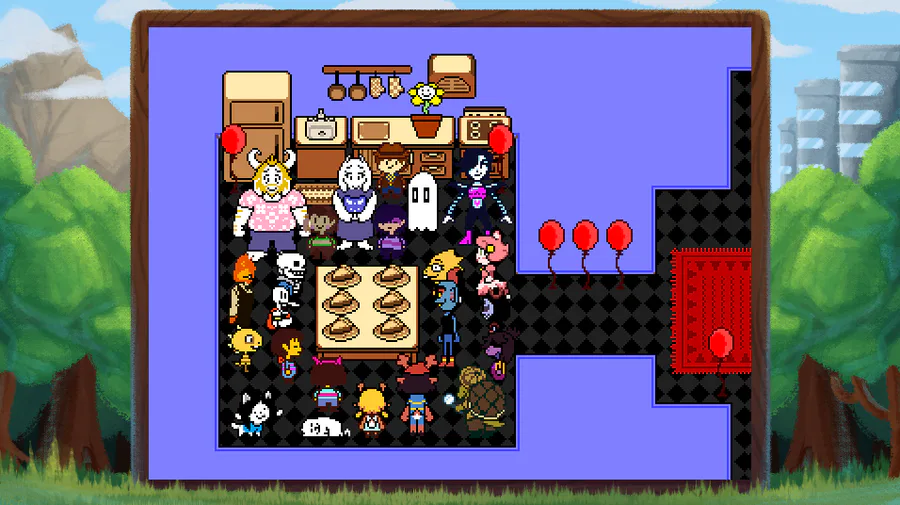
And, is in general just a fun gamemode overall. To put it simply, imagine yourself playing UNDERTALE, except you're fighting other players via bullets (don't ask). You can access it either in the Hub...

(Note: You must go to the left of the Ruins teleport door to access this room.)
...or simply by entering "/FFA" (not case sensitive) into global, or by pressing F. Of course, due to the fact that this has mouse controls --- It has no mobile support. That said, while on the topic of controls:
PART 1 - CONTROLS & BASIC MECHANICS
When you first go on to the FFA menu screen, you may notice that the controls are stated in the bottom left.

These are, while true - Slightly lackluster in confirmation. I will merely expand upon them in this section to save both of our times.
First of all, if you have a Controller plugged in and have Controller Support enabled, the controls are different, however do not vary by controller:

Whenever you have a controller plugged in, WASD will not work. You MUST use the Analog Stick or D-PAD, or, alternatively - something the game doesn't tell you about - use the arrow keys.
You may be already familiar with the typical WASD and mouse layout. Mouse to look around, M1 to shoot, M2 (or a variety of other keys) to reload, and the run buttons, therefore - That said, for now I'll touch in on the basics.
BASE MECHANICS
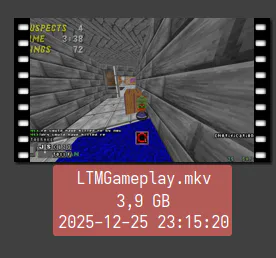
You may notice that you can run (shocking, I know). However, the little green dot on the minimap turns yellow. This is because running comes at the cost of your opponents being able to see you on the minimap.

(Apologies for horrid framerate, as you can tell though - As long as @cybop_9 (thank you!) was running here, he showed up on the minimap, but when he wasn't (if the footage doesn't lag at that), he was not visible on it)
This may seem quite insignificant - But if you watch it consistently, and your opponents do as well, then this can be actually quite a nasty trick! For instance, pretending to run away, only to then walk back after stopping to run, or pressing shift for a split second as if you died and are currently respawning.
Constant running beware, however! The accuracy of your bullets dramatically decreases while running!
Besides this, you may have also noticed that when hit, players turn red and their overhead HP bar clearly goes down. All players have 20 HP and 1 bullet deals 4 DMG, with atleast 1/10th a second as iframe (refer to the flash of red).
(removed gif - the lag here is unbearable)
That, and when a player dies, they drop a green save star:

This is actually what you have to collect in order to "confirm" the kill, earning you +1 XP, used for gaining Power, which goes up one each 10 kills.

Of course, since you are dropping a save star, this means dying takes one XP. In this mode, it's survival of the fittest if you want your power to go up.
This is the sole reason competition exists in FFA - Who can garner the most power and remain at the top?
However, whenever you also collect XP, it's not just your Power that can go up. It is also the amount of bullets you can have. At the moment, I lack the motivation to cut some footage of me blasting everything with them, so I will merely explain them: Each 3-5 kills, your weapon will gain an extra bullet when fired. Note however this does not take any extra ammo, nor does it extend your clip size.
It goes as follows:
BLUE - Singular/Normal/Regular (LV1)
YELLOW - Double (LV2)
GREEN - Triple (MAX)
You can see "how much is left" by looking at the bar in topright corner with a gun to it's left, for your Power, it's the Deltarune symbol, and the one next to that is how many players besides you are in the game.
PART 2 - PERKS
While it would be nice to talk about these in-depth, for the sake of simplicity (as this is meant to be an introductory part of the guide), I will merely describe what they do.

In general, I recommend only using Faster Reload while you have blue bullets. At yellow and green, I recommend switching to regen and committing to just rushing. However, you should not literally rush - Be strategic in that sense, else you may end up outwitted and utterly crushed.
With that covered, we move on to...
Part 3 - Basic Strategies - Player to Player Interaction
You may imagine this mode as quite a beefy, balls-to-the-walls death match battle, but really, it is not.
In FFA, you can "pick your battles", and the opponent can prolong them, however you can drag them (and yourself!) into all sorts of pickles of battling with other people that will involve themselves to get that sweet sweet XP drop.
One of the tactics most commonly used is, quite ironically...!
Hiding
Now, now. I know what you're thinking - "But fluffo! We all clearly have an overhead HP bar! How can we actually hide"?
To that I say, structures that are wider and taller than the player.

(Footage was staged for the purpose of this guide as an attempt to show that this does not mean people will not check for your location!)
Things like Papyrus' Stand and the skelebros house can cover you very well, and in Hotland - These large pipes are nightmares espeially, with how many are around in Hotland.
Moving onto to another -
Just run at them.
Your target is low, and you spawned near? Run for revenge! Be careful, though. Other people exist, still!
Okay, but why are you not mentioning fighting in general?
A shootout between two players is typically more like a song and dance of it's own - Both clearly move predictably (so they can try shooting the enemy), and the consensus to a loss can be described as "rookie mistakes cause a death".
For instance, running in cramped hallways while you don't know the location of other players - One could be at the other end of the hall, now sending barrages of bullets at you that you are unable to avoid, leading to a death. Waterfall is a prime example of this.
Of course, Ping unfortunately falls into play, and with high ping players, they have an advantage, as you have to predict how desynced their sprite and hitbox are. More often than not, you can simply shoot a bit ahead of them and it hits.
Try to predict the enemy's moves, they will typically move in straight lines or barely divert from a clear path, beware however this goes for you as well, because you too have to aim!
If you are low on HP, resort to tricks, as prolonging the battle may not be healthy if someone decides to make use of how busy you are while fighting!
And that, concludes Section 1. With Section 2 of various japes and tricks to go, once I have motivation.
Big ty to cybop for helping me do slower, more analysible footage rather than a chaotic normal match. Neither of us gained anything out of this.


3 comments