So, to start, I use Photopea. Easiest way to do it, in my opinion. You'll want to get a good idea of how to use that.
First off, I clipped the portrait's background straight from The Spriters Resource. Click here for the original so you can copy it. The image is supposed to be 100 x 100 pixels in total, but I somehow ended up with 104 x 104, so...
As for the actual drawing, I started with the base of Spirit Mari's portrait, and did the outlines first. I drew these with my touchpad on my Chromebook, which is important, because I'll use the touchscreen later.
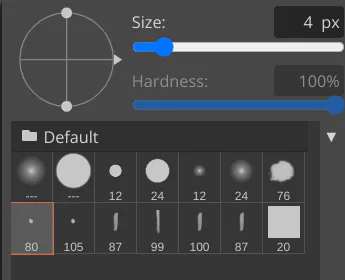
As for the brush itself, I chose that bottom left one and set the size to 4.
Once I drew the outline and facial features for the first frame, I discarded the base portrait and worked without it. I also added another frame below the drawing frame that's simply a solid white blob that goes behind the actual face and hair part of the sprite. It essentially keeps the sprite from looking uncomfortably transparent and whatnot. I also added a layer of Brightness/Contrast, only changing the Brightness to -150%. Otherwise everything looks a bit too sketchy and transparent.
To color in the hair, I first used my touchpad to draw lines in it that were up and down for most of it, and curved for the top left and right. You keep doing this until you've gotten most of it, it looks really nice.
After that, I just used my finger on the screen (with "Stylus Pressure controls Opacity" and "Stylus Pressure controls Size" off) and rubbed over the entire hair area randomly. It partially fills in most of the holes, which helps a lot with making it authentic.
Once I finally had the first frame done, I renamed the sketch frame to "_a_frame1" to work with Photopea animation (look at the official tutorial article on that for more details). For the other two frames, I simply redrew it over the top of the previous one, creating a very natural-looking line boil effect.
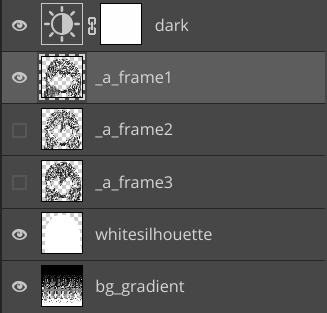
Once all is said and done, your layers should look something like this.
When exporting, make sure to export as GIF, and set the speed to 50%.
Have fun!










5 comments