Hey hey!
When everything goes wrong
This was my first time rigging and animating a 3D character. I knew this would be a difficult process like everyone said, but it was beyond complicated. Everything that could go wrong, went wrong!
I think people who work with animations must love their jobs because it’s not living on the easy street.
The most important thing before rigging you character is that you have created and formed your model with it in mind. Like thoughtful placement of joints and bones. You have to plan everything out in detail before you even start modeling, which I had no idea that you needed to do. As stated before, I had never rigged a character until I started working on this project.
Rigging
Creating joints from scratch was not the difficult part, I just had to place them where I wanted connect them and preferably name them the right way. Later I added IK-handles and an IK Spline Handle.
There is a plug-in program for rigging as a bonus tool, I saw many tutorials on how people use it. It’s called Quick Rig but I wanted to learn by myself how to do everything from the beginning.
Importance of T-pose
My first mistake was not to model my character in a T-pose. I had no idea of what a T-pose was and that I should model my character after it. If you don’t know what a T-pose is, like I didn’t know, here is the example.
T-Pose Models
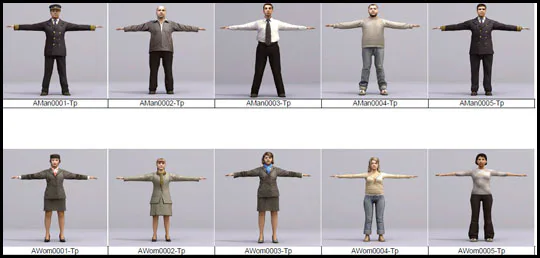
My character had the hands/arms down (no T-pose here) and to close to the body, so when I created joints and IK-handles on arms they also controlled the hips. The joint control was too strong and I tried to paint it over with something called weight painting in Maya.
Painting skin weights can influence movement of your joints. If the color is red, it’s the most control and the blue color is less control. Even though hip on my character was blue(less control) it was affected to much by the hand joint.
Painting skin weights
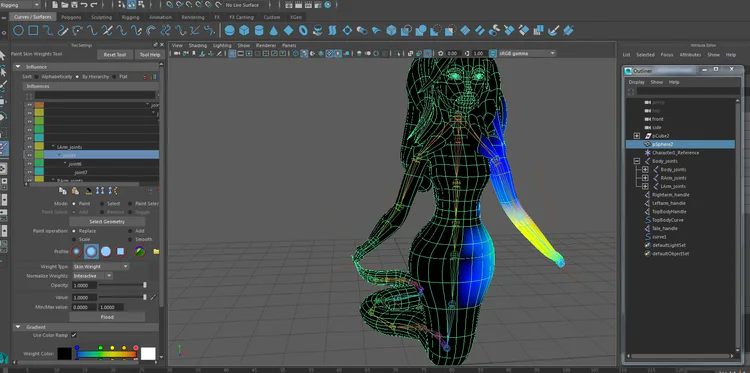
I tried to remove all control but it didn’t work so well for me. I still got the hip movement on my character at the same time when I moved her arm upwards. Unfortunately, I decided to move on to the lower body rigging and animation and thought that I would redo the arms to a T-pose later, if I had time for it.
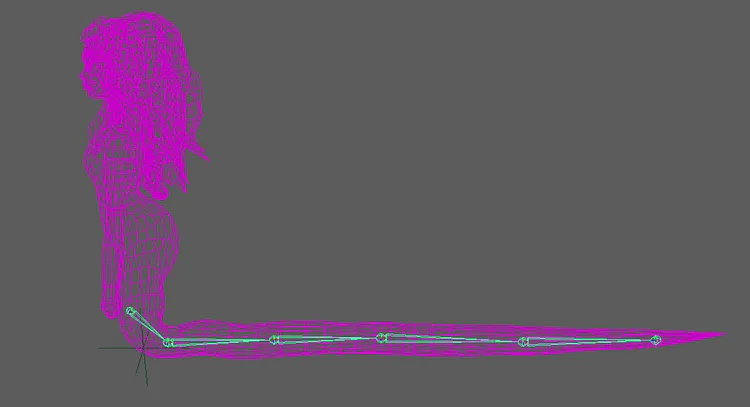
My second mistake was the tail. I created a tail on my character already bend and curvy in shape. For easier rigging and animation it should have been straight. So I had to straighten out the whole lower body -tail part, on which I lost even more time.
Straight tail
Animation and trouble in paradise
The main curve on the IK spline Handle controller didn’t work together with joints and I still don’t know why?
So I had to improvise and animate my character differently than in standard way.
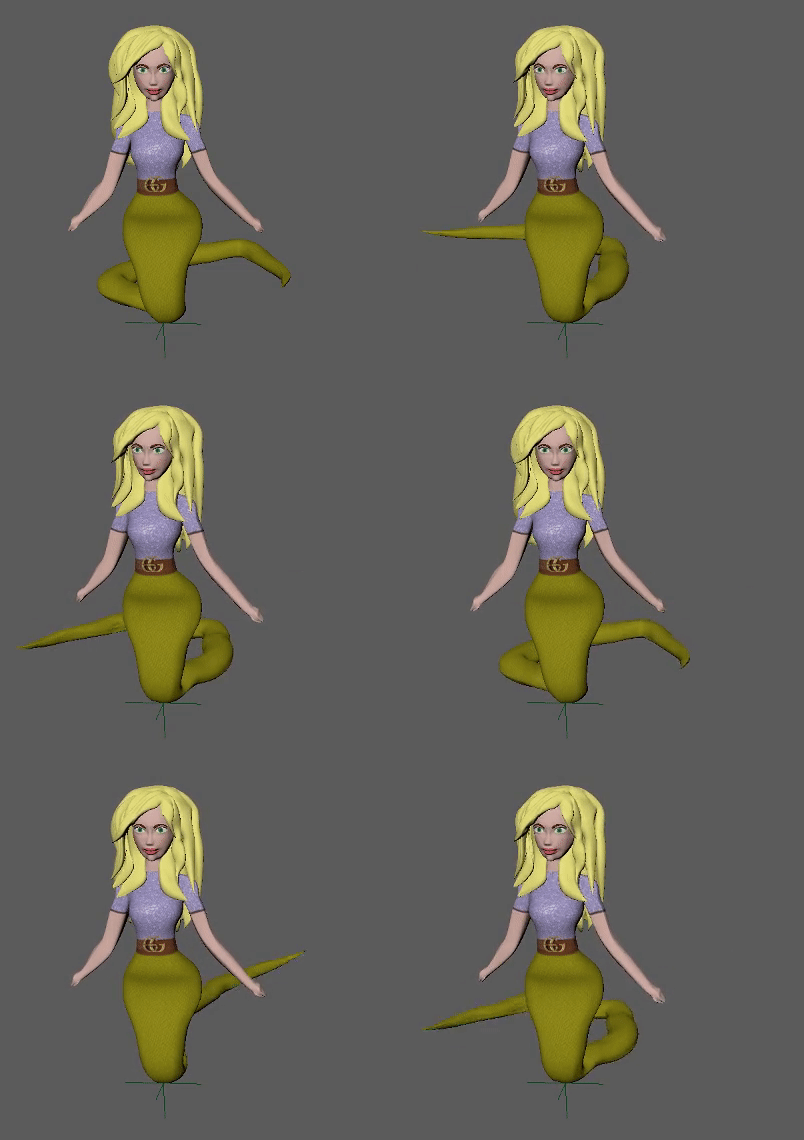
I did it by moving the joints to the desirable points and locking them down by isolating their placement (keyframes). I did everything manually and I changed joint positions on 1, 12, 24, 48, and 72 frame. When I was done with locking the desirable keyframes I baked animation in range 1 to 72.
I also figured that I had no time left for animating the upper body, so I didn’t change the arms to a T-shape and I removed all of the joints I didn’t use.
After everything Luna looked something like this.
Luna Animation gif
Exporting to Unity
New problems arrived of course, not everything can be easy and go smoothly. I first tried the Maya’s own option to export to Unity (File-Send to Unity) and placed things directly in the Unity project folder but that didn’t work and it made my 3D character mesh look rough and unpolished with too many edges.
I redid the mesh in Maya and I smoothed it down (Mesh-Smooth) but that didn’t help so much, my model was still the same. I tried to export files manually as FBX file but that didn’t work either.
Then I figured that the problem was with my animation. My old mesh was bound to the animation and exports like that to Unity. To fix this I would need to smooth the mesh before animation and animate everything one more time from the beginning.
Unfortunately, I had no time left on this project to remake things but it is huge lesson learned. The order you do things in matters so much when you work with 3D modeling and animating.
This was my last blog post for this project but I’ll see you out there in the game making world.
Bye guys!
Until some other time …
/Ana Jaksic
0 comments