
Ok! Let's continue from the point where we stopped last time!
If you have any questions or comments, refrain from asking them during the tutorial and ask them at the end (in the Comment section!)
In our last tutorial, we created two different Construct objects: a Progress Bar (which functionally we'll use but that we think is ugly) and a Sprite (which has no bar functionally but looks pretty).
Now... all we need to do is tie these suckers together. So let's
Part 3: Tying These Suckers Together
Ok, fellas. Easy part's over.
Now the time has come for us to crack our knuckles and to program some events.
This is the event that tells our Custom Bar (a glorified Sprite) to "follow" the Progress Bar wherever it goes:

Confusing?
It can be! What does this crap do?
Let's break it down. Using MATHS (sorry... we can't avoid it).
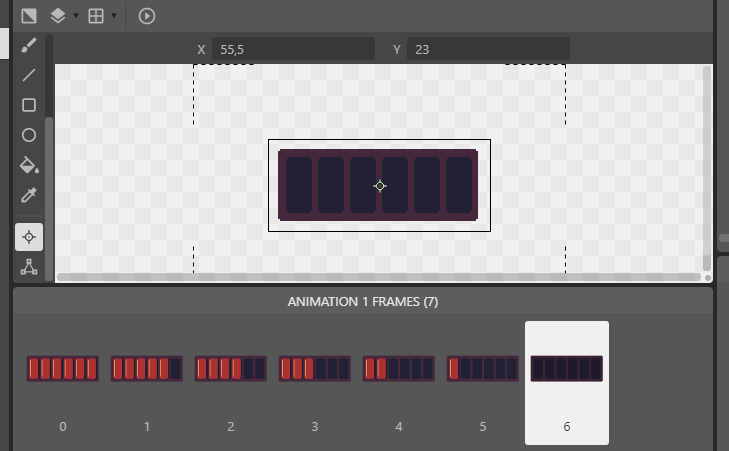
Since the frames in our Sprite have been created to "pretend" to be the multiple states the bar can be, we want the sprite to "be in the frame" that corresponds to where the bar would be. For a 7-frame Sprite, it means this:
00% to 14% -> Frame 0
15% to 30% -> Frame 1
31% to 45% -> Frame 2
...
86% to 100% -> Frame 7
Technically speaking, this rule could be programmed to check 7 times and have a different event for each frame. However, this is not very practical... especially if you had 20, 40, or 100 frames!
Lucky for us, there's a formula that can save us from this trouble!
If we take the original Progress Bar parameters called Progress and Maximum (see? I told you using the native Progress Bar would help us) and divide the former by the latter, we'll have a number that ranges from 0 to 1 (because Progress can't be bigger than Maximum, and when Progress = Maximum, Progress/Maximum = 1).
So, when we multiply this fraction Progress/Maximum by the total number of frames T our Sprite has, this is what we get:
Progress/Maximum x Total Frames = Result
0.00 x 7 = 0.00
0.15 x 7 = 1.05
0.29 x 7 = 2.03
0.43 x 7 = 3.01
0.58 x 7 = 4.06
0.72 x 7 = 5.04
0.86 x 7 = 6.02
1.00 x 7 = 7.00
If we round the numbers we have in the Result column up, we'll have the frames we want, as the bar goes up!
That's why the formula works.
Now let's test this baby out.
Part 4: Testing The Baby
For testing purposes, here's what we'll do. We will create an event in our event sheet that, at every 0.8 seconds, will randomize the value in our Progress Bar, between 0 and 100. Here's how this event should look like:

Now let's see what happens when we press play!

See?! It works!!!
I'm also surprised! Usually, my code doesn't work on the first try!
Now, if we were making our own game, we, of course, would be randomizing the bar's value. We would be setting it to the value we want, decreasing it, and increasing it when it would make sense. But the principle would be the same: we would change the value in Progress Bar, and this change would reflect in our Sprite Bar.

Now, before we finish, the only thing we need to do is make the Progress Bar invisible. Forever. This is done with the mere de-checking of a check box:

Now, when we press play...

It's like the ugly, default Progress Bar didn't even exist in the first place!
Well, that's the end of our custom bar tutorial, folks! Hope you folks have enjoyed it and that you found it useful!
If you had any trouble during any part or if you wanna make other comments, or even request some different type of tutorial, let me know in the comments! :)
Bye!


11 comments